Happy Sunday! As promised I am bringing you another tutorial! This time it's all about Bears! I have a Bear Themed Baby Shower coming up and this cute little bear is part of the decorations on the cake. What cute bear? Well, follow along and you will see how he's made....or just skip to the bottom of this page to get a peek! LOL!
I set the lighter of the two balls back into a bit of plastic wrap so it wouldn't dry out and then divided the larger ball into it's pieces. One for the body, one for the head (and ears), two for legs and two slightly smaller ones for arms.
Then I rolled out the body. I wasn't too worried about the "seam" lines that happen when you roll fondant because I knew I was texturing the bear later. I made the body sort of oval and then, using my thumbs, marked where I wanted the legs and arms.
Then for the head. I rolled out a big ball and flattened it out. Nice and round...like a teddy bear head.
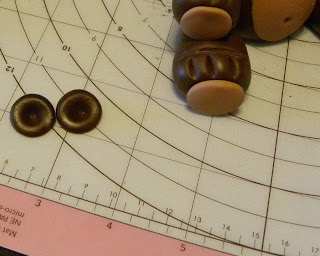
I rolled the legs into small logs that had one end fatter than the other. Then I tapped that end down on my mat to make it flatter. Using this tool I used one end to make the foot mark and the other end to make the toes markings.
I did exactly the same thing to the arms. They are thinner and shorter than the legs but have the same markings.
I brought out the little light brown fondant ball at this point to make the pads. I needed one for the face, one for the belly, two for the feet and two for the arms.
The one for the face I rolled into a ball and then flattened it out to sort of a triangle. Then using the same tool I used on the feet I added a nose line and a mouth and eyes. The nose is actually a little round candy that was stuck on with a little tylose glue. This is made from a little bit of warm water and powdered tylose.
Next I added on the pads by rolling them up, flattening them out to about the thickness of a nickle and then using a piping tip, cut out the circles. Then I spread them out gently to fit the pads of the arms and feet. Finally I rolled out the belly pad and used an oval cutter to cut it out before placing it on and adding a belly button.
Now for the ears. For those you make little balls and when you flatten them out you sort of push down, leaving one edge thinner than the other. Then I used a small ball tool to make the center indention.
I used toothpics at each join. For the arms, the legs, the head and the ears. I insert the toothpic into the body, add tylose glue and then stick on the part. But for the ears I do it just a bit differently. For the ears I stick in the ends of a toothpick, sort of like pre-drilling the hole.
Then I insert the pointy end of the toothpick into the ear and sort of wrap that thinner edge around the pic. This is not the time for perfectly round ears. His ears are part of his "personality" so make them a bit uneven and different from eachother. Then I put glue where I want the ears to sit, in the pre-drilled holes, and place the ears there.
The last thing I did was use a scalloping tool to lightly "scratch" in fur for our bear. For the face I only used it to make a tuft of hair over the eyes and on the cheeks but then scratched away on the back of the head and all over the body. Then I added a bit of black food dye to the eyes with a broken toothpic. Just to give them a bit more depth and color.
The final touch was to give him some pad marks on his hands and feel by using that same small ball tool that I used on the ears and gently pressing down into the pad.
Now here is the funny part. Whenever I make a figurine I feel like they grow a personality and a name at the same time. These figures are never "it" but always, from the beginning, a "he" or "she". This bear is so very clearly a "he" to me. So everyone, I'd like you to meet Rudy. Rudy the Bear, welcome to the world!
See y'all next week! There is a Bridal Shower cake on tap that I can't wait to share with you all!
Cat


No comments:
Post a Comment