Happy Sunday! As promised today, I will be working on a sugar rose.
I have an upcoming cake that is a "background cake" for Beauty and the Beast. I have the figurines already purchased and ready to go on the cake, now I just need the cake!
The cake topper for this cake will be "The Rose". Because it will be "suspended" under a dome I need the rose to be rock hard before I assemble the topper piece...thus, even though the cake is not due till the 18th, I need to start work on the rose now. And here is the reason...
I love using Duff's Fondant, bought at Michaels with their 40% off coupon of course, but it is a very "soft" fondant. You have to make adjustments in your timeline in order to get it to dry out enough.
The first thing you have to do is add tylose or gumpaste. I prefer tylose and use about a teaspoon for a small amount like this. I know, I know, it seems like a lot of tylose for such a small amount of fondant but this is VERY soft fondant...it needs the tylose or you will be waiting days for the petals to dry up enough just to be able to use them!
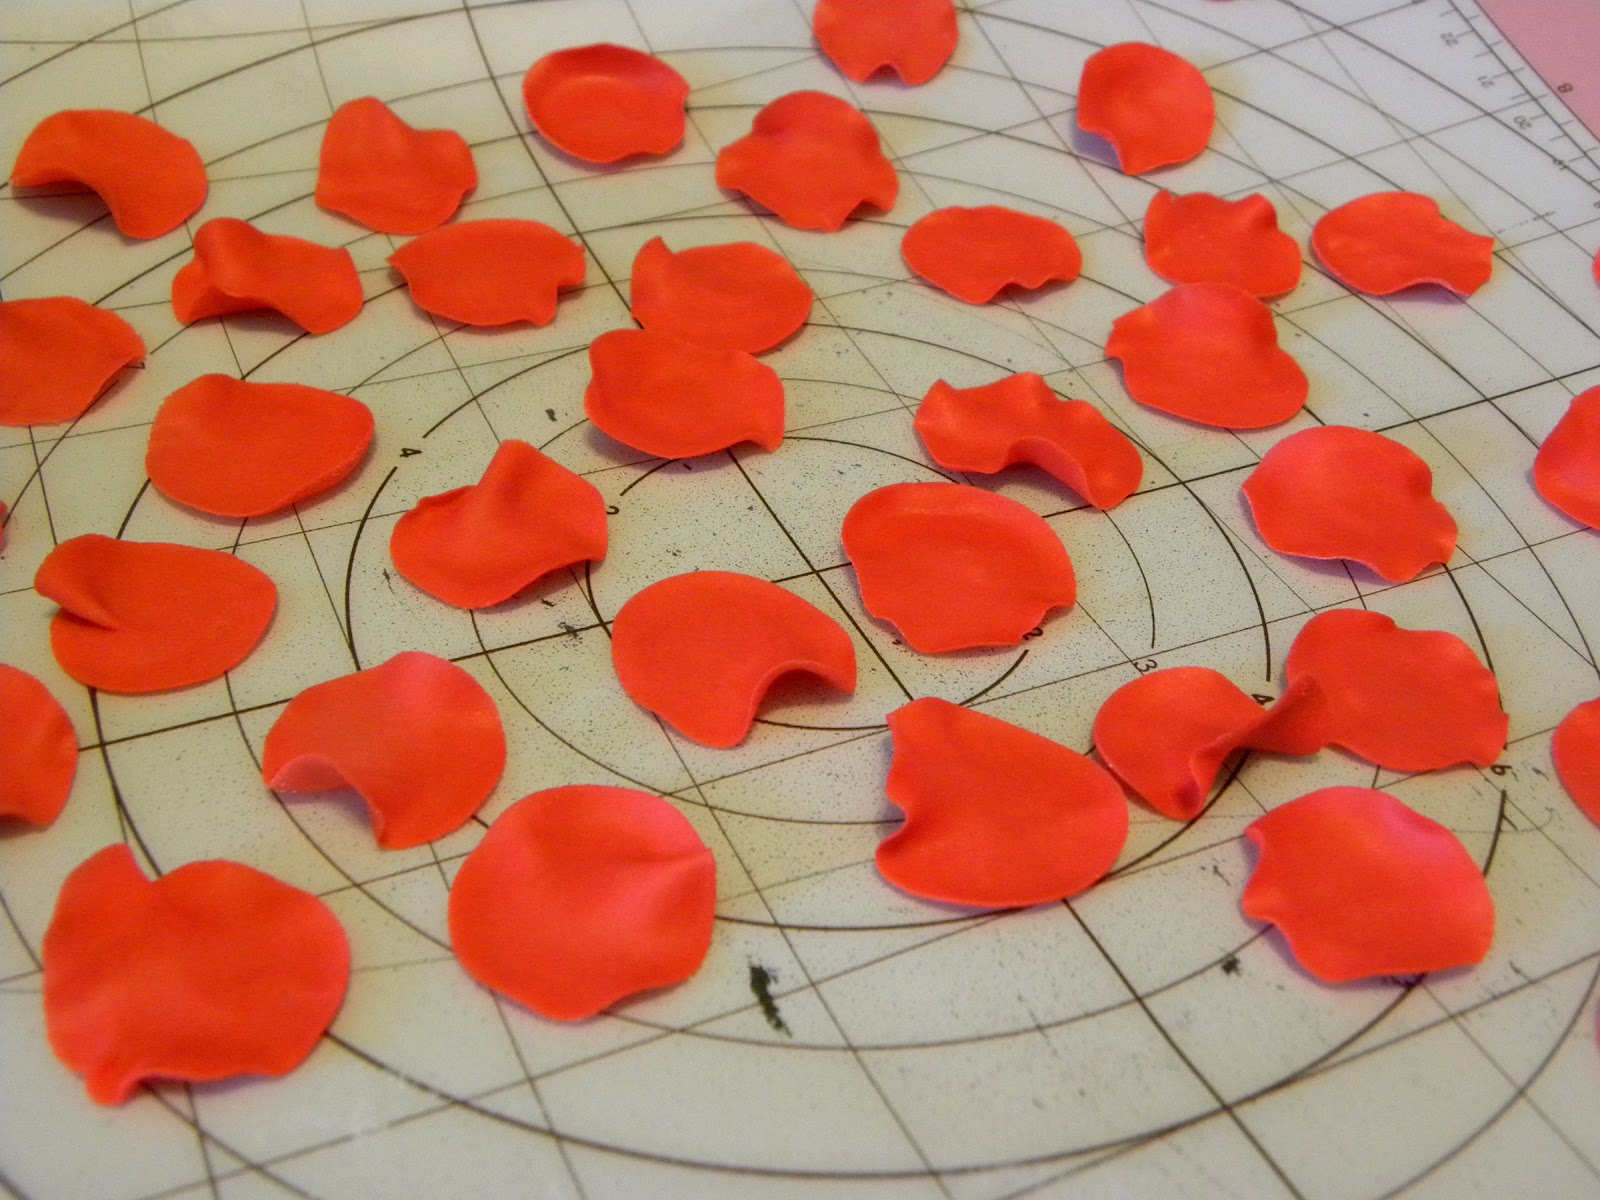
After kneading the tylose in very well I then roll out the fondant to about the thinness of a dime. The top of this cake is only 6 inches so I have to make sure the rose isn't too big for it. Normally I use round cutters but a piping tip worked perfectly for this size of petal.
Once I cut them all out and removed the excess fondant I used this "ball tool" above to start ruffling the edges.
I use a thin foam mat and begin, in a circular motion, from the middle of the circle to the outside edges lightly pushing out and down. As the fondant gets thinner it will begin to ruffle.
For this rose I cut out about 30 rounds. This is for two reasons. One is that this is a very compact rose style and you never know when you will go to use a petal and it will tear or bend wrong or break so you should always have back up petals just in case. I ended up using about 25 out of the 30.
Next I made up my "glue". This is just tylose sprinkled over water and then mixed well and allowed a bit of time to "gell" up. When you first stir it into the water it will look "clumpy" like it didn't actually mix in well. Give it a few moments then stir it again. You will see it start to get clear and gell like in texture. Add more tylose or more water to get the consistency of white glue.
Next I cut floral wire the length I think I need for my rose height. Then I rolled out a small center oval for my rose bud. I dipped the wire into the "glue" and then inserted this into the oval ball. I then let it set up for a small while. Do not rush this process or your rose will fall apart. Especially if you are working with soft fondant to begin with!
I then began the process of adding the first petals around the oval ball to create my rose bud. I just used a paint brush to brush on a bit of glue onto the petal and then put that around the oval ball.
This is the center of your rose. You will build up all the rest of your rose based on this center.
I added another petal and then let it set up for about an hour. If you rush this process then the weight of the petals and glue will drag your petals down and off your wire and just make a mess.
Then I gradually started to build up my rose till I had a smallish size group of petals. Once again I stopped and let it dry up for about an hour.
This is the last step before adding the final larger petals to the outside. I have about 25 petals onto the rose now and this is where I will let it set up overnight and dry.
Normally I would have hung my rose upside down on a wire rack but I need the wire on this rose to stay straight and not have a loop on the bottom of it. So I used a small box that I put a hole into the top for the stem to poke through and then used a shallow flower cup to hold the rose while it dried overnight.
The next morning I added the final big petals to the rose. I cut out 5 more circles of thicker fondant and then, using the ball tool, ruffled them out till they were the same thickness as the smaller petals. This makes for a uniform bottom of your rose.
You can now see the final rose with the larger petals framing the smaller ones. For whatever reason my camera photographed this more orange than red but it is truly red.
I then rolled out the green fondant and cut out the calyx, or bottom leaves, for the rose. I used a bit of glue in the middle and on part of the leaves and then stuck the wire right through the center. Then I started pressing the calyx to the rose.
I also used a leaf cutter to cut out the leaf shapes. Then used the ball tool to thin them out and give more realistic edges to each one but leaving the base of the leaf thicker than the tip. I used a veining tool to make the lines. Finally I used really fine wire that I inserted into the thicker end and then let them dry.
The first thing I did before moving on was to go look at a photo of the Beauty and the Beast rose so I could know how it is supposed to bend and where to put the leaves. It kinks in two places so I slightly bent the wire before starting with the floral tape. I began the floral tape on the top of the wire, where the wire meets the rose, and then wrapped it to the bottom and then back to the top again leaving a tail.
Then I wired the leaves onto the stem and continued taping the stem all the way to the bottom again helping to secure the wired leaves.
Here it is fully wired and wrapped.
Storing this rose, while it dries, was an interesting problem. I finally ended up getting chopsticks that are not broken apart but separated just enough to hold up the rose where it meets the taped wire and then suspended those off a bucket tall enough so the stem doesn't touch the surface and then weighted the chopsticks down to make sure they stay secure. They will sit like this until it is time to assemble the cake top. When that times comes, more wire will be inserted into the stem from the bottom and then down into a stir stick which will be into the cake. This will hold the rose a small way up from the surface of the cake to give the illusion of it being suspended under the dome on top of the cake.
Hope this tutorial helped you to understand how to make a sugar flower...or at least what goes into the process of making one. If you have ANY questions just leave them in the comments section and I'll do my very best to help!
See you next week with a sugar bear tutorial!
Cat


No comments:
Post a Comment