Happy Sunday! Hope everyone had a really wonderful week while I was on vacation. I have to say it felt extremely weird to not have work to do for a whole week and even weirder not to post a blog! I was in Hawaii on The Big Island with family enjoying a getaway that brought about some thoughts about the Destination Weddings I have worked or have been privileged to share with friends this summer.
So many times the Bride and Groom think they have to sacrifice a cool looking or personalized cake because they are having a Destination Wedding or a small wedding that only includes immediate family members. The cake above is a prime example of just such an occasion! This small 8 inch by 3 inch cake feeds just 20 which is perfect for a small wedding of mostly family with just a few friends.
The dark chocolate fudge cake filled with brownie buttercream and covered in vanilla marshmallow fondant fit in perfectly with the black and white themed wedding. The little touches of red echoed the color of the wedding flowers. The only part non-edible on this cake was the banner, the rest was just plain yummy!
Whether you have a smaller wedding or one away from home you can find a bakery to make you a very special cake like this one for your day. And if you have someone in your family who bakes this is an easy design to copy. All you need is a heart shaped cookie cutter, white and red fondant and black sanding sugar.
After I cut out the white hearts I used a pattern press to press in the filigree onto some of the hearts and then I brushed the rest of the white hearts with water and sprinkled them with the sanding sugar. After they were dry I set them out onto the cake and then used black buttercream to pipe on the balloon ties. The last thing I did was add the bow using a toothpick so it would stick easily into the side of the cake.
Finally it was time for the banner. Since banners were used as part of the wedding theme in general I thought a small "Just Married" banner would be adorable on the front of the cake. Since this is non-edible I had to figure out a way to attach it to the cake. Finally I decided to use a toothpick that had been broken in half. The pointed end went into the cake and the broken end was covered with a small ball of red fondant. Not only did it anchor the banner to the cake but it also put another splash of color onto the cake.
Since the design of this cake was fairly simple the cost for it was $3 a slice. Normally my buttercream cakes begin at $3 a slice and the fondant cakes at $4 a slice but this one wasn't my normal 8x4 cake...it was only 8x3 so I only charged the buttercream price instead making this sweet little cake total up to $60. Average wedding cake prices fall between $200 and $600 but this little intimate wedding was anything but average so the small cake, and lower price, was perfect for their event. Personalized doesn't mean expensive, it means that your cake artist works with your budget to give you a personal cake that fits your event. Most cake artists will be able to work with your budget or give you options for your budget so you can afford your cake and eat it too! Just ask.
See you next week when I will share with you some delicious Dinner Party Cupcakes!
Cat
Sunday, September 30, 2012
Sunday, September 16, 2012
Happy Sunday! Today's cake is what I call a "Dinner Party Cake". A long time client is having her girlfriends over for a dinner and she requested a particular cake. For one of her dinner parties last year she asked for dark chocolate brownie cupcakes filled with caramel and then topped with ganache and drizzled with caramel. These were such a huge hit that she wanted me to do the same in cake form this time. Let me show you how I did it...
I baked the dark chocolate brownie cake and the "torted" it. This means to divide it into layers. I then wrapped each layer, stacked them and then wrapped them again and put them in the freezer. When I was ready to use the cake I took it out of the freezer, unwrapped it and then filled it and let it thaw out for 2 hours. The filling is a mixture of caramel sauce and buttercream with a bit of powdered sugar to firm it up a bit. I didn't want it to be a really firm filling since the whole idea of this cake is to have puddles of wonderful chocolate and caramel on the plate.
When the cake was thawed completely I made the ganache. Ganache is just a chocolate sauce and it is really easy to make. It is a 2 to 1 ratio of chocolate to cream. So I chopped up 8 ounces of really good chocolate and put it into a ceramic bowl. You need the glass or ceramic to help evenly melt these so don't use plastic. I then heated the 4 ounces of cream to a boil and poured it over the chocolate pieces allowing them about 30 seconds to melt before I began stirring with my wisk. Keep stirring until it is solid, dark and shiny. Then walk away. I know, I know, it's SO hard to walk away from that lucious sauce but you need to do so for at least 15 minutes. The longer ganache cools the thicker it will be. I wanted puddles for this cake but I did want it to actually cover the cake so I ended up waiting about 30 minutes before pouring it over the cake. If you don't want to pour it you can cover the container and put it in the refridgerator for a few hours or even overnight. When it is solid you can then whip it in your mixer and spread it on like frosting.
Start pouring from the center of the cake and pour about half of the bowl on top. This is a six inch cake so you may want more for a larger cake. I wanted puddles and not a perfectly smooth finish so I just gently spread the ganache to the edges from the middle and let it drip down the sides. I then used the rest of the ganache on top to fill any parts of the sides that had been missed the first time around. After that was finished and all of the cake was covered I popped it into the freezer for 15 minutes to set the ganache.
Next came the caramel sauce. My goal was to end up with a perfect pool of caramel around the edges of the cake so I was careful not to use too much on top. I poured a small puddle and then pushed that off the edges in 4-5 directions. I didn't want to cover the cake, just drip it off of the cake. Back into the freezer for 15 minutes.
I melted more of the chocolate in the microwave and then put it into a plastic ziploc bag that I had snipped just the tip off one corner. Then I piped a random design onto parchment along with some swirls for the sides of the cake. These went onto a sheet pan and in the freezer for 5 minutes to set up.
Once they were set up I was able to easily lift them off of the parchment and place them onto the cake. The caramel acted like glue and they went on very easily.
As you can see, the caramel kept dripping down the cake until I had a nice ring around the cake. But here's the secret...it is almost impossible to gauge how much caramel you really need since it keeps dripping down. I just put the stand onto parchment and let it drip off the sides of the plate. I then used a damp napkin to clean the edges.
The client was amazed at how I translated the decadent cupcakes into cake form! No better pay off than that!
Next week I will be a bit late with the cake blog. I'll be bringing it to you on Tuesday instead of Sunday. I will see you then with a brand new cake!
Cat
I baked the dark chocolate brownie cake and the "torted" it. This means to divide it into layers. I then wrapped each layer, stacked them and then wrapped them again and put them in the freezer. When I was ready to use the cake I took it out of the freezer, unwrapped it and then filled it and let it thaw out for 2 hours. The filling is a mixture of caramel sauce and buttercream with a bit of powdered sugar to firm it up a bit. I didn't want it to be a really firm filling since the whole idea of this cake is to have puddles of wonderful chocolate and caramel on the plate.
When the cake was thawed completely I made the ganache. Ganache is just a chocolate sauce and it is really easy to make. It is a 2 to 1 ratio of chocolate to cream. So I chopped up 8 ounces of really good chocolate and put it into a ceramic bowl. You need the glass or ceramic to help evenly melt these so don't use plastic. I then heated the 4 ounces of cream to a boil and poured it over the chocolate pieces allowing them about 30 seconds to melt before I began stirring with my wisk. Keep stirring until it is solid, dark and shiny. Then walk away. I know, I know, it's SO hard to walk away from that lucious sauce but you need to do so for at least 15 minutes. The longer ganache cools the thicker it will be. I wanted puddles for this cake but I did want it to actually cover the cake so I ended up waiting about 30 minutes before pouring it over the cake. If you don't want to pour it you can cover the container and put it in the refridgerator for a few hours or even overnight. When it is solid you can then whip it in your mixer and spread it on like frosting.
Start pouring from the center of the cake and pour about half of the bowl on top. This is a six inch cake so you may want more for a larger cake. I wanted puddles and not a perfectly smooth finish so I just gently spread the ganache to the edges from the middle and let it drip down the sides. I then used the rest of the ganache on top to fill any parts of the sides that had been missed the first time around. After that was finished and all of the cake was covered I popped it into the freezer for 15 minutes to set the ganache.
Next came the caramel sauce. My goal was to end up with a perfect pool of caramel around the edges of the cake so I was careful not to use too much on top. I poured a small puddle and then pushed that off the edges in 4-5 directions. I didn't want to cover the cake, just drip it off of the cake. Back into the freezer for 15 minutes.
I melted more of the chocolate in the microwave and then put it into a plastic ziploc bag that I had snipped just the tip off one corner. Then I piped a random design onto parchment along with some swirls for the sides of the cake. These went onto a sheet pan and in the freezer for 5 minutes to set up.
Once they were set up I was able to easily lift them off of the parchment and place them onto the cake. The caramel acted like glue and they went on very easily.
As you can see, the caramel kept dripping down the cake until I had a nice ring around the cake. But here's the secret...it is almost impossible to gauge how much caramel you really need since it keeps dripping down. I just put the stand onto parchment and let it drip off the sides of the plate. I then used a damp napkin to clean the edges.
The client was amazed at how I translated the decadent cupcakes into cake form! No better pay off than that!
Next week I will be a bit late with the cake blog. I'll be bringing it to you on Tuesday instead of Sunday. I will see you then with a brand new cake!
Cat
Sunday, September 9, 2012
Happy Sunday! Today it's all about Cupcakes! Ok, cupcakes and cupcake LINERS! This week I had lemon cupcakes on the docket with plain old vanilla buttercream. Yup, it tastes very well together but can look fairly boring. That is until you add a fancy wrapper and bow!
In the past few years cupcake liners have really made a change. Before you could buy the pastel colored ones. Pink, blue, green, yellow and white came all in one package. And I do still use these quite a bit. Your other alternative was the foil liners that come with a really thin white inner liner. These can look very cool all by themselves but invariably I get burned on them so they are not a favorite of mine. But since the "revolution" of cupcake liners there are getting to be more and more available in the store....yup, the regular old grocery store...that you can buy and turn your every day cupcake into a mini work of art.
One of the complaints I hear from clients is that they could bake a cupcake but not have it turn out like one of mine. Part of it is the ingredients I use. So the taste of the cake. But, mostly, it seems that what they really like are the look of the cupcakes. This week was no different. Small birthday party for a 2 year old. She wanted "Minnie Mouse" cupcakes. I suggested the ones above but with mini cookies for the ears but she didn't want to take a chance of the little ones in the group choking on the pieces. So I promised I would make the icing a bit more fancy and keep the bows and polka dots.
The bows are just thin strips of fondant folded over into the middle and then another strip for the center piece. That's it. Really. It is really that simple. I used a 1M tip for the piping and just piped strips of buttercream from the outside edge into the middle and then stuck the bow right on top. And while the bow would have been cute on a cupcake in a white liner it is the red and white polka dot liner that says "Minnie Mouse".
Here are a few of my favorite liners I have used over the past few years...
The red of the liner really works to coordinate with the little lady bug on the topper. Just that hint of red made all the difference.
There are fun themed liners as well. These Gingerbread Men liners helped to add even more whimsy to these reindeer cupcakes for a Christmas Party last year.
They can add a bit of elegance to the party as well. These sweet little heart patterned liners really set off the simple yellow cake and vanilla buttercream cupcakes and coordinated beautifully with the little fondant arrows.
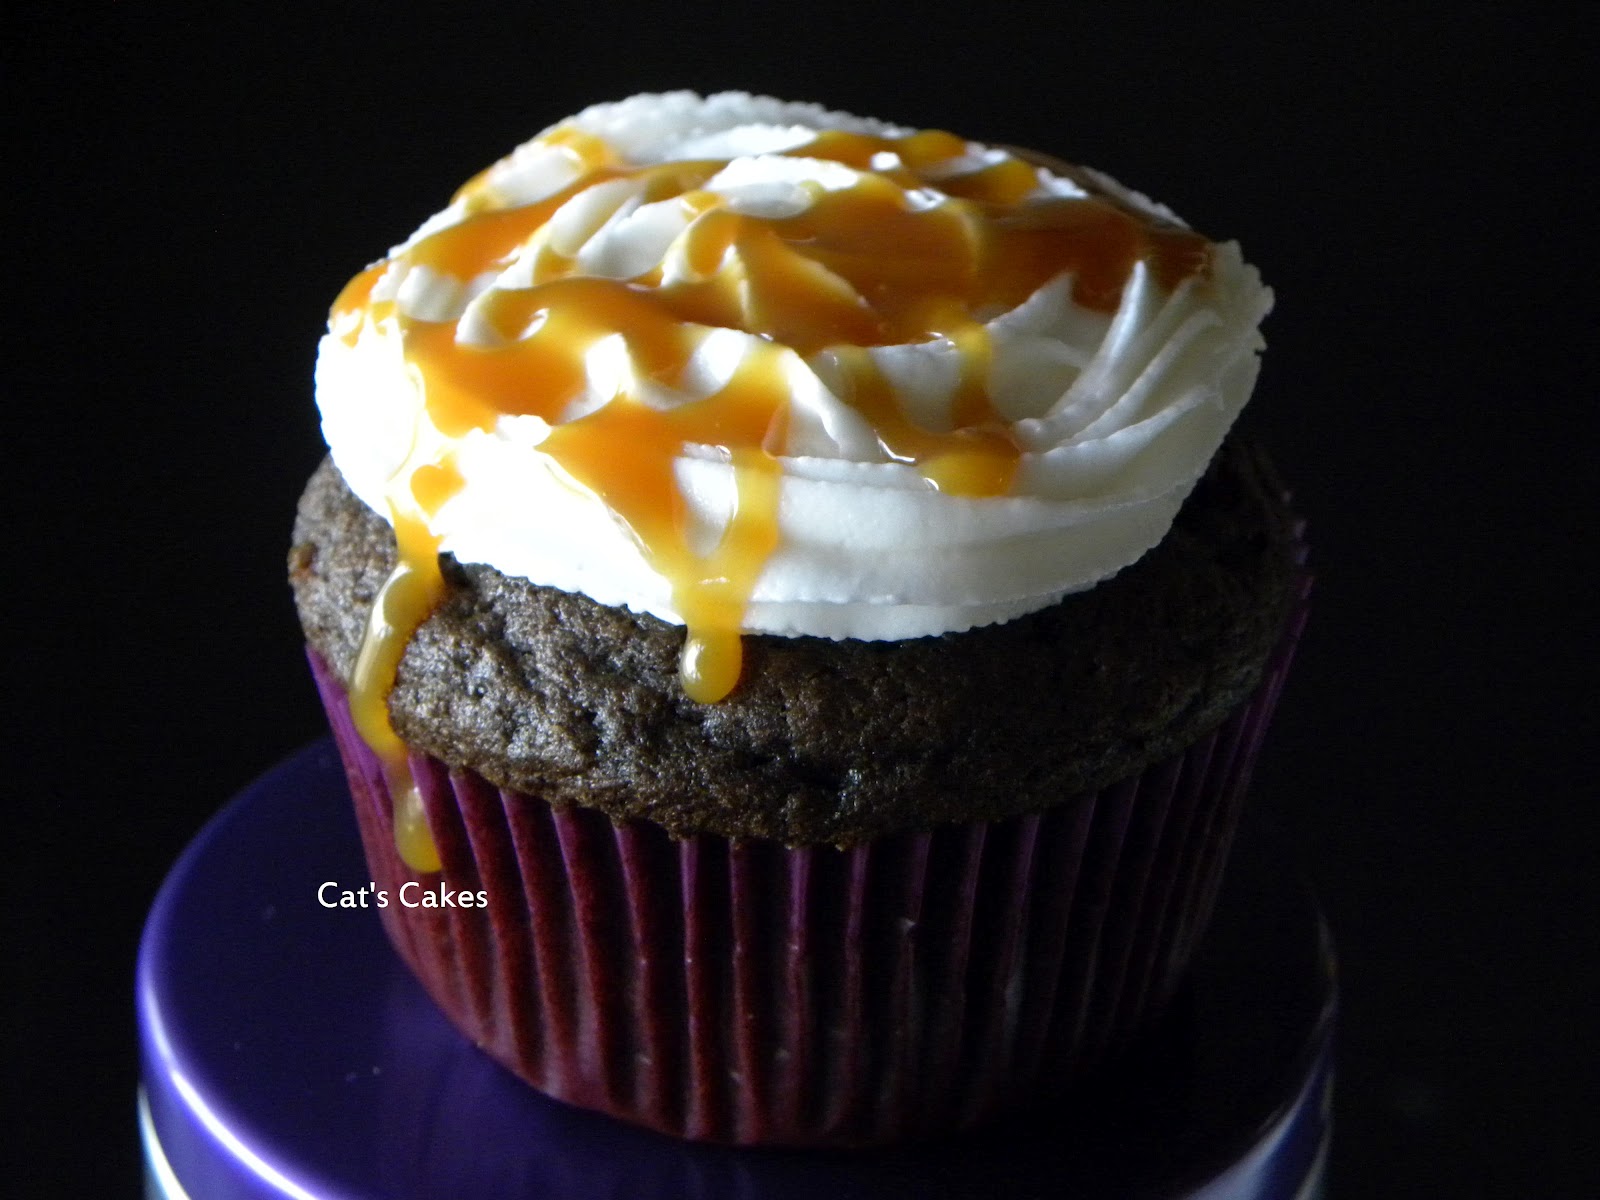
Sometimes it's a mood you are trying to set. You want to be funny or romantic or elegant. These cupcakes were meant to just look sinful. Mexican Hot Chocolate cupcakes filled with caramel then topped with buttercream and drizzled with caramel...no, a plain white wrapper would not have done them justice. But this dark purple one sets the decadence off just right.
The other fun product out there are cupcake wrappers! Bake the cupcakes in any type of liner and then slip them into this outside wrapper for maximum effect. The "popcorn" cupcakes were baked in plain white wrappers and then put into the striped wrappers before the marshmallow "popcorn" was added on top. Too fun!
Wrappers also span the range between funny and elegant. These chocolate starfish cupcakes are perfectly adorned by these gold wrappers that pick up the gold sugar that was sprinkled on top. Very elegant indeed.
So the next time you need to bring cupcakes take a few minutes to browse the liners at your local cake store or craft store...or even your grocery store aisle! It is a lot easier to have a fun looking, or elegant looking, cupcake than ever before!
Speaking of elegant...my order this week is for ganache! Can't wait to share this sinful cake with you next Sunday!
Cat
In the past few years cupcake liners have really made a change. Before you could buy the pastel colored ones. Pink, blue, green, yellow and white came all in one package. And I do still use these quite a bit. Your other alternative was the foil liners that come with a really thin white inner liner. These can look very cool all by themselves but invariably I get burned on them so they are not a favorite of mine. But since the "revolution" of cupcake liners there are getting to be more and more available in the store....yup, the regular old grocery store...that you can buy and turn your every day cupcake into a mini work of art.
One of the complaints I hear from clients is that they could bake a cupcake but not have it turn out like one of mine. Part of it is the ingredients I use. So the taste of the cake. But, mostly, it seems that what they really like are the look of the cupcakes. This week was no different. Small birthday party for a 2 year old. She wanted "Minnie Mouse" cupcakes. I suggested the ones above but with mini cookies for the ears but she didn't want to take a chance of the little ones in the group choking on the pieces. So I promised I would make the icing a bit more fancy and keep the bows and polka dots.
The bows are just thin strips of fondant folded over into the middle and then another strip for the center piece. That's it. Really. It is really that simple. I used a 1M tip for the piping and just piped strips of buttercream from the outside edge into the middle and then stuck the bow right on top. And while the bow would have been cute on a cupcake in a white liner it is the red and white polka dot liner that says "Minnie Mouse".
Here are a few of my favorite liners I have used over the past few years...
The red of the liner really works to coordinate with the little lady bug on the topper. Just that hint of red made all the difference.
There are fun themed liners as well. These Gingerbread Men liners helped to add even more whimsy to these reindeer cupcakes for a Christmas Party last year.
They can add a bit of elegance to the party as well. These sweet little heart patterned liners really set off the simple yellow cake and vanilla buttercream cupcakes and coordinated beautifully with the little fondant arrows.
Sometimes it's a mood you are trying to set. You want to be funny or romantic or elegant. These cupcakes were meant to just look sinful. Mexican Hot Chocolate cupcakes filled with caramel then topped with buttercream and drizzled with caramel...no, a plain white wrapper would not have done them justice. But this dark purple one sets the decadence off just right.
The other fun product out there are cupcake wrappers! Bake the cupcakes in any type of liner and then slip them into this outside wrapper for maximum effect. The "popcorn" cupcakes were baked in plain white wrappers and then put into the striped wrappers before the marshmallow "popcorn" was added on top. Too fun!
Wrappers also span the range between funny and elegant. These chocolate starfish cupcakes are perfectly adorned by these gold wrappers that pick up the gold sugar that was sprinkled on top. Very elegant indeed.
So the next time you need to bring cupcakes take a few minutes to browse the liners at your local cake store or craft store...or even your grocery store aisle! It is a lot easier to have a fun looking, or elegant looking, cupcake than ever before!
Speaking of elegant...my order this week is for ganache! Can't wait to share this sinful cake with you next Sunday!
Cat
Sunday, September 2, 2012
Happy Sunday and Happy Father's Day to those "Down Under"! Hope you are having a fun time celebrating with your families! Today I bring you a Baby Shower cake from last weekend.
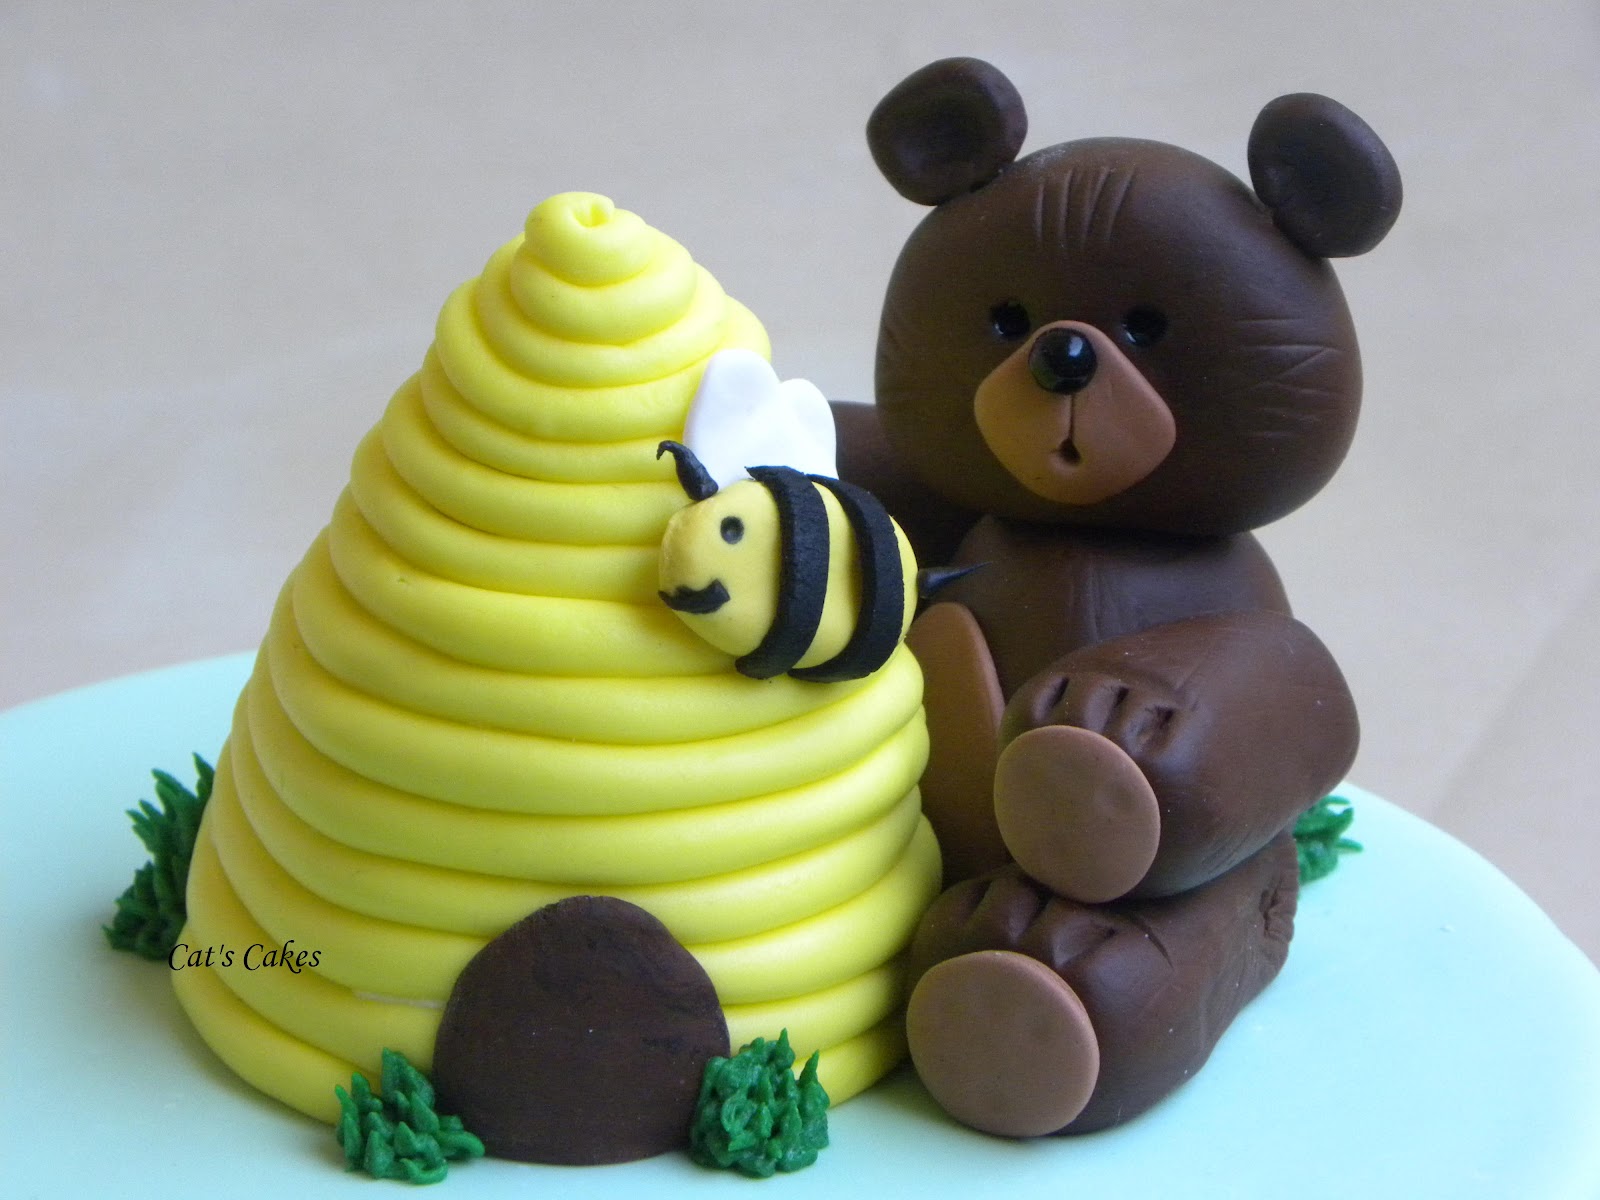
The Theme was bears and bees and since this is their second child they wanted to make sure the first child wasn't left out so we incorporated little details just for her into the cake. The cake is a lemon chiffon with both fresh sliced strawberries and strawberry preserves for the filling. Everything on the outside of the cake is fondant except for the "grass" which is piped buttercream.
One of the "secrets" of this cake is the ribbon around the middle. For many cakers the biggest frustration is the filling "bulge". And with fresh fruit cakes there just doesn't seem to be a way around it. Once the cake settles, the fruit slides and pushes out the buttercream "dam" and you end up with a bulge. Even after you have cleaned up that bulge, once you put the fondant on top the weight of that is going to make the cake settle and yup, you guessed it, bulge. But if you can place some sort of decoration at that point of the cake then you have a chance of camouflaging it as I did with the ribbon. Is there still a bulge...yup but it looks just fine with the ribbon over it.
The other part of the details which disguises the bulge is the bees. Just little half rolls of yellow fondant with black stripes and details, these little guys took the better part of an afternoon to do just because the details are so small. I rolled out white fondant really thin and then cut small circles and gently stretched them out to make the wings. Then I layered two together and placed them on the cake where I wanted to place a bee and then just stuck the bee on top. Once all the bees were in place I added the "trails" from one bee to the other all the way around the cake. These bees were a hit with the other kids at the party. One little boy said he needed another one to eat because his first one "flew away" LOL!
The bow is also fondant and I mixed just a bit of tylose into the fondant to help it dry up quickly. I rolled out a strip of the fondant and then pinched/rolled the center. I then used the handles of two of my fondant tools as a brace as I rolled the ends of the strip back to the middle. I let that set up for a few moments so the water I used as glue could work and then flipped the bow over and fluffed it up a bit. Once the bow was completely dry I was able to remove the tools and have a stand up bow. At that point I added the middle bow piece and added it to the cake. The plaque is just thick white fondant with a thin piece of blue layered on top.
Finally we get to the topper. Here is the other "secret" of this cake. The bee hive is actually a hidden cupcake! This was the first child's own personal part of the cake. She was delighted! To make this I just cut off part of the dome on the cupcake so it would sit flat upside down on the cake board. Then I crumbcoated it with buttercream and finally covered it with the yellow fondant "snakes" to make the hive. Of course at the bottom of the cupcake, which is now the top since we turned it upside down, is flat so I rolled up a fondant egg and put that on top so I could continue the hive cone. When we served it to the little girl we removed the top of the cone so she was left with fondant and cupcake only.
The bear is the same one I covered a few weeks ago in the tutorial. He is a keepsake. When you let fondant dry out enough it becomes hard as a rock. It's mainly sugar after all. This you can keep in a low humidity place for, literally, forever. And because every part of him is toothpicked together he will stay put together. A fun keepsake from the party once it is over.
And speaking of the party! I will be covering that one tomorrow on the Cherry Party Blog, http://thecherryontopevents.blogspot.com/ ,
so make sure to check that one out tomorrow for some great Baby Shower ideas!
See you next week!
Cat
The Theme was bears and bees and since this is their second child they wanted to make sure the first child wasn't left out so we incorporated little details just for her into the cake. The cake is a lemon chiffon with both fresh sliced strawberries and strawberry preserves for the filling. Everything on the outside of the cake is fondant except for the "grass" which is piped buttercream.
One of the "secrets" of this cake is the ribbon around the middle. For many cakers the biggest frustration is the filling "bulge". And with fresh fruit cakes there just doesn't seem to be a way around it. Once the cake settles, the fruit slides and pushes out the buttercream "dam" and you end up with a bulge. Even after you have cleaned up that bulge, once you put the fondant on top the weight of that is going to make the cake settle and yup, you guessed it, bulge. But if you can place some sort of decoration at that point of the cake then you have a chance of camouflaging it as I did with the ribbon. Is there still a bulge...yup but it looks just fine with the ribbon over it.
The other part of the details which disguises the bulge is the bees. Just little half rolls of yellow fondant with black stripes and details, these little guys took the better part of an afternoon to do just because the details are so small. I rolled out white fondant really thin and then cut small circles and gently stretched them out to make the wings. Then I layered two together and placed them on the cake where I wanted to place a bee and then just stuck the bee on top. Once all the bees were in place I added the "trails" from one bee to the other all the way around the cake. These bees were a hit with the other kids at the party. One little boy said he needed another one to eat because his first one "flew away" LOL!
The bow is also fondant and I mixed just a bit of tylose into the fondant to help it dry up quickly. I rolled out a strip of the fondant and then pinched/rolled the center. I then used the handles of two of my fondant tools as a brace as I rolled the ends of the strip back to the middle. I let that set up for a few moments so the water I used as glue could work and then flipped the bow over and fluffed it up a bit. Once the bow was completely dry I was able to remove the tools and have a stand up bow. At that point I added the middle bow piece and added it to the cake. The plaque is just thick white fondant with a thin piece of blue layered on top.
Finally we get to the topper. Here is the other "secret" of this cake. The bee hive is actually a hidden cupcake! This was the first child's own personal part of the cake. She was delighted! To make this I just cut off part of the dome on the cupcake so it would sit flat upside down on the cake board. Then I crumbcoated it with buttercream and finally covered it with the yellow fondant "snakes" to make the hive. Of course at the bottom of the cupcake, which is now the top since we turned it upside down, is flat so I rolled up a fondant egg and put that on top so I could continue the hive cone. When we served it to the little girl we removed the top of the cone so she was left with fondant and cupcake only.
The bear is the same one I covered a few weeks ago in the tutorial. He is a keepsake. When you let fondant dry out enough it becomes hard as a rock. It's mainly sugar after all. This you can keep in a low humidity place for, literally, forever. And because every part of him is toothpicked together he will stay put together. A fun keepsake from the party once it is over.
And speaking of the party! I will be covering that one tomorrow on the Cherry Party Blog, http://thecherryontopevents.blogspot.com/ ,
so make sure to check that one out tomorrow for some great Baby Shower ideas!
See you next week!
Cat
Sunday, August 26, 2012
Happy Sunday! This past week brought two fun cakes. The first one I spotlighted last Sunday so here is the second cake! For those who are wondering what the heck this is, well, it's from a T.V. show called Dr. Who. In the show, the Dr. flys all over the place through space and time...he uses the TARDIS to do this. So this is his space and time machine!
I know, I know, but what about copyright? Here is the groovy thing about this cake. It's just a Kent Police Box. Yup, these exist in real life in the UK. As real Police Boxes. So while we know that this is "Dr. Who" there is no copyright on a Kent Police Box. I was as thrilled as can be when I found this out!
Now, how to make this. It was certainly not easy and it was all due to the fondant. As I have mentioned before, I don't make my own red, black or blue fondant. It takes too much dye which changes the taste too much. Duff's fondant, comes in all sorts of wonderful colors and tastes wonderful too so when I need any of those three above mentioned colors I go to Duff's. However...and here is the sticking point...Duff's is really really...did I mention "really"?....SOFT. When covering a cake or making snakes for filigree it is a wonderful thing to work with. It's smooth and soft and wonderful. Except when you need it to be stiff. Then it's a nightmare to work with. But here is how I made do.
I started off with a 10x10x2 inch cake and cut it directly in equal halves. Then I filled it, stacked it and crumb coated it as always which then made it a 10x5x5 inch cake. In this case it was a yummy marble cake with vanilla buttercream filling. Then I started out covering each side of the cake with a thin panel. Knowing how soft the fondant is I wanted to give it a bit more base for me to work upon. I also had the idea that I could put the "doors" on and then mark the panels with it on the cake. Nope. Once I had the base layer of fondant on the cake I added the thicker "door" layer. Unfortunately the first time I tried to emboss a panel onto the door the cookie cutter slid right through the soft fondant to the crumbcoat layer. After three tries at this I gave up and made the doors with the panels on a matt and then attached those to the cake. This meant that while the embossing went well, the attaching left for some not so straight lines. After working on this for 2 hours I was happy with a few crooked lines! LOL!
Once I got the paneled doors on I did cut out the top sections for the windows, added white fondant in place of the blue and then used very thin strips to frame the "windows". For the base I just cut a slightly larger "slab" of fondant so it would stick out a bit and then trimmed the entire frame with more thick strips. Finally I was to the top. I didn't want to make that out of cake so I decided to mold the fondant. Yes, I'm a bit slow and figured this would be easy. Nope. Not so. Why? You guessed it, the fondant is SOFT. UGH! Ok, so I very slowly took my time, laid down the base slab and then started molding the top "hat" looking piece. I finally had to make it taller and thinner than I wanted it to be because the soft fondant kept settling as it dried a bit. I let it sit for 3 hours and then added it to the top of the cake and then, like the doors and base, trimmed it out with some thick strips. The light at the top was fairly easy. I rolled out an "egg" of white fondant then gently tapped one end flat. Then I put a few crisscross straps of black as the "cage" for the light and finally a bit of blue on top for the cap. I used a toothpick on the flat end to stick it into the top "hat" part of the building. I then used a thick snake of black fondant to add the number 6 to the bottom of the TARDIS and some thinner snakes to spell out the wording on the cake board.
Here came the hardest part. The signs. I have a Cricut Cake machine. This cuts out wonderful letters for me...until you get under 1/2 inch. Then I have to pipe any lettering I need. I have mentioned before that this is my weakness when it comes to caking. I'm not great at piping lettering. I seriously dreaded doing this piping so it was the very very last thing I did. The "big" letters are only a quarter of an inch tall and the little ones about 1/16th of an inch tall. So I rolled out the big blue slab base for the sign and added that to the cake. Then rolled out a slightly smaller piece of black fondant and let it set out and dry up a bit. The last thing I wanted to do is have that black piece be too wobbly when I went to place it on the cake and have all my lettering crack! So let this piece get really hard. I added a ton, not literally, of tylose to my black to make it really firm before rolling it out. Once I could pick it up without it bending I took a deep breath and began piping...and got it on the FIRST TRY! Yup, I was estatic...right until I put it on the cake and smudged a letter and then had to repipe that letter on the cake. SIGH. Things don't always go perfectly. The really sad news is that I had three, yes, three of these identical signs to pipe and the front sign to pipe as well. It was a long afternoon.
As always, the payoff was seeing the birthday girl's face when she saw her cake, watching her pull everyone over to see it as they arrived for the party, and hearing all of her friends ooooo and ahhhh over it. Worth every second of soft fondant and piping that I went through.
Happy Birthday again Sarah! I know you had a wonderful time and I am so happy you loved your Dr. Who TARDIS cake!
Next week I have a totally adorable Shower Cake to share with you! See you then!
Cat
I know, I know, but what about copyright? Here is the groovy thing about this cake. It's just a Kent Police Box. Yup, these exist in real life in the UK. As real Police Boxes. So while we know that this is "Dr. Who" there is no copyright on a Kent Police Box. I was as thrilled as can be when I found this out!
Now, how to make this. It was certainly not easy and it was all due to the fondant. As I have mentioned before, I don't make my own red, black or blue fondant. It takes too much dye which changes the taste too much. Duff's fondant, comes in all sorts of wonderful colors and tastes wonderful too so when I need any of those three above mentioned colors I go to Duff's. However...and here is the sticking point...Duff's is really really...did I mention "really"?....SOFT. When covering a cake or making snakes for filigree it is a wonderful thing to work with. It's smooth and soft and wonderful. Except when you need it to be stiff. Then it's a nightmare to work with. But here is how I made do.
I started off with a 10x10x2 inch cake and cut it directly in equal halves. Then I filled it, stacked it and crumb coated it as always which then made it a 10x5x5 inch cake. In this case it was a yummy marble cake with vanilla buttercream filling. Then I started out covering each side of the cake with a thin panel. Knowing how soft the fondant is I wanted to give it a bit more base for me to work upon. I also had the idea that I could put the "doors" on and then mark the panels with it on the cake. Nope. Once I had the base layer of fondant on the cake I added the thicker "door" layer. Unfortunately the first time I tried to emboss a panel onto the door the cookie cutter slid right through the soft fondant to the crumbcoat layer. After three tries at this I gave up and made the doors with the panels on a matt and then attached those to the cake. This meant that while the embossing went well, the attaching left for some not so straight lines. After working on this for 2 hours I was happy with a few crooked lines! LOL!
Once I got the paneled doors on I did cut out the top sections for the windows, added white fondant in place of the blue and then used very thin strips to frame the "windows". For the base I just cut a slightly larger "slab" of fondant so it would stick out a bit and then trimmed the entire frame with more thick strips. Finally I was to the top. I didn't want to make that out of cake so I decided to mold the fondant. Yes, I'm a bit slow and figured this would be easy. Nope. Not so. Why? You guessed it, the fondant is SOFT. UGH! Ok, so I very slowly took my time, laid down the base slab and then started molding the top "hat" looking piece. I finally had to make it taller and thinner than I wanted it to be because the soft fondant kept settling as it dried a bit. I let it sit for 3 hours and then added it to the top of the cake and then, like the doors and base, trimmed it out with some thick strips. The light at the top was fairly easy. I rolled out an "egg" of white fondant then gently tapped one end flat. Then I put a few crisscross straps of black as the "cage" for the light and finally a bit of blue on top for the cap. I used a toothpick on the flat end to stick it into the top "hat" part of the building. I then used a thick snake of black fondant to add the number 6 to the bottom of the TARDIS and some thinner snakes to spell out the wording on the cake board.
Here came the hardest part. The signs. I have a Cricut Cake machine. This cuts out wonderful letters for me...until you get under 1/2 inch. Then I have to pipe any lettering I need. I have mentioned before that this is my weakness when it comes to caking. I'm not great at piping lettering. I seriously dreaded doing this piping so it was the very very last thing I did. The "big" letters are only a quarter of an inch tall and the little ones about 1/16th of an inch tall. So I rolled out the big blue slab base for the sign and added that to the cake. Then rolled out a slightly smaller piece of black fondant and let it set out and dry up a bit. The last thing I wanted to do is have that black piece be too wobbly when I went to place it on the cake and have all my lettering crack! So let this piece get really hard. I added a ton, not literally, of tylose to my black to make it really firm before rolling it out. Once I could pick it up without it bending I took a deep breath and began piping...and got it on the FIRST TRY! Yup, I was estatic...right until I put it on the cake and smudged a letter and then had to repipe that letter on the cake. SIGH. Things don't always go perfectly. The really sad news is that I had three, yes, three of these identical signs to pipe and the front sign to pipe as well. It was a long afternoon.
As always, the payoff was seeing the birthday girl's face when she saw her cake, watching her pull everyone over to see it as they arrived for the party, and hearing all of her friends ooooo and ahhhh over it. Worth every second of soft fondant and piping that I went through.
Happy Birthday again Sarah! I know you had a wonderful time and I am so happy you loved your Dr. Who TARDIS cake!
Next week I have a totally adorable Shower Cake to share with you! See you then!
Cat
Sunday, August 19, 2012
Happy Sunday! This week brings a very special cake for a very special little girl...our granddaughter, Jillian. Jilly turned 3 this week. As you can see, we are a Disney family and she is a huge Beauty and the Beast fan!
Her cake is what we call a "background" cake. Since the figures are Disney copyrighted I made a cake for them to sit upon and around that gave the "feel" of the animation. Of course, being for a family member, I'm not selling this cake so, according to copyright law, I could have made the figures. But I thought, what if someday a client wants the same cake? I wouldn't be able to do that for them. So I figured Jilly would love the play set for after the party and this way I'd be able to work within the copyright law if I made a similar cake later on for a paying client.
Several of the pieces, along with the play set, were done before making the cake. The rose, dome and the library shelves had to be done days ahead in order to allow them to dry before assembly. The shelves were hand painted on white fondant. It was a fun challenge. It is harder to make straight lines that are not perfectly straight up and down than you may think. I wanted the books to look as close to the real thing as I could get in miniature. But books don't sit in a bookshelf straight up and down. They lean from side to side a bit. As I said, it was a fun challenge. It also took almost a full day to do this work. A good example of the level of artistry when you hire a designer as well as a good example on why this type of cake costs more than a supermarket cake. I let the shelves dry overnight against an 8 inch form and then the next day formed the shelf moulding for the bottom of the bookcase. I painted that and allowed it to dry for a full day. In the meantime I took a regular rounded juice glass and turned it upside and added the fondant "finial" to the top, painted it gold and let it dry.
The cake underneath is lemon chiffon and is filled with vanilla buttercream. The fondant is colored vanilla marshmallow fondant. My goal is always that the cake inside tastes as good as the outside looks. I can tell you from the piece I had at the party that it is really good cake!
When it came to assembling I draped over the brighter color of fondant to meet at the edge of the front and then drape around the sides and back. Then I set on the library shelves. I did not attach these to the cake with water. I want to be able to easily remove them when it comes time to cut the cake. I then rolled out rectangles of the bright fondant and draped it around the edges, like curtains, of the bookcase. I started with that edge and did the same type of draping around one side and then the other side, leaving the back drape for last. This is so I could size the back drape to fit. If I needed to be 3 inches long or 5 inches long or 4.5 inches long I could adjust as needed without ruining the spacing or look of front of the cake. After those had set for a bit I added the darker shade of yellow to the drapes. Finally I used a flower cutter to cut out the moulding pieces under the roses. Lastly I used the royal icing roses, set on toothpicks, at each join to add another layer of decor as well as another layer of stability at the joins.
Finally it was time to do the cake topper. And here is where tragedy struck. A few weeks back I did a whole blog about making a sugar rose. Unfortunately when I was measuring how tall the rose could be inside the dome I slipped and the rose hit the dome...and shattered. Yup, shattered. Fortunately I had more of the royal icing roses, and a good example of why I always make more than I think I will need, so I was able to remove the broken sugar rose and, using the same stem with leaves, attach a new calyx and a royal icing rose and still have one for the center of my cake! Whew!
At last I was able to place the figures and the sparkly 3 on the cake for a finished view of Jilly's Birthday Cake! This is one of the few cakes where I can say I am perfectly happy with it. Usually, as an artist, you pick on your work...this should have been like this...that should have gone like that...but for this cake I'm perfectly happy. I really wouldn't change a thing.
This week wasn't just Miss Jilly's Birthday but also Miss Sarah's! I'll share her special cake with you next week!!! Happy Birthday to both my granddaughter and my niece. I'm so happy I got to make these cakes for your special days!
Cat
Her cake is what we call a "background" cake. Since the figures are Disney copyrighted I made a cake for them to sit upon and around that gave the "feel" of the animation. Of course, being for a family member, I'm not selling this cake so, according to copyright law, I could have made the figures. But I thought, what if someday a client wants the same cake? I wouldn't be able to do that for them. So I figured Jilly would love the play set for after the party and this way I'd be able to work within the copyright law if I made a similar cake later on for a paying client.
Several of the pieces, along with the play set, were done before making the cake. The rose, dome and the library shelves had to be done days ahead in order to allow them to dry before assembly. The shelves were hand painted on white fondant. It was a fun challenge. It is harder to make straight lines that are not perfectly straight up and down than you may think. I wanted the books to look as close to the real thing as I could get in miniature. But books don't sit in a bookshelf straight up and down. They lean from side to side a bit. As I said, it was a fun challenge. It also took almost a full day to do this work. A good example of the level of artistry when you hire a designer as well as a good example on why this type of cake costs more than a supermarket cake. I let the shelves dry overnight against an 8 inch form and then the next day formed the shelf moulding for the bottom of the bookcase. I painted that and allowed it to dry for a full day. In the meantime I took a regular rounded juice glass and turned it upside and added the fondant "finial" to the top, painted it gold and let it dry.
The cake underneath is lemon chiffon and is filled with vanilla buttercream. The fondant is colored vanilla marshmallow fondant. My goal is always that the cake inside tastes as good as the outside looks. I can tell you from the piece I had at the party that it is really good cake!
When it came to assembling I draped over the brighter color of fondant to meet at the edge of the front and then drape around the sides and back. Then I set on the library shelves. I did not attach these to the cake with water. I want to be able to easily remove them when it comes time to cut the cake. I then rolled out rectangles of the bright fondant and draped it around the edges, like curtains, of the bookcase. I started with that edge and did the same type of draping around one side and then the other side, leaving the back drape for last. This is so I could size the back drape to fit. If I needed to be 3 inches long or 5 inches long or 4.5 inches long I could adjust as needed without ruining the spacing or look of front of the cake. After those had set for a bit I added the darker shade of yellow to the drapes. Finally I used a flower cutter to cut out the moulding pieces under the roses. Lastly I used the royal icing roses, set on toothpicks, at each join to add another layer of decor as well as another layer of stability at the joins.
Finally it was time to do the cake topper. And here is where tragedy struck. A few weeks back I did a whole blog about making a sugar rose. Unfortunately when I was measuring how tall the rose could be inside the dome I slipped and the rose hit the dome...and shattered. Yup, shattered. Fortunately I had more of the royal icing roses, and a good example of why I always make more than I think I will need, so I was able to remove the broken sugar rose and, using the same stem with leaves, attach a new calyx and a royal icing rose and still have one for the center of my cake! Whew!
At last I was able to place the figures and the sparkly 3 on the cake for a finished view of Jilly's Birthday Cake! This is one of the few cakes where I can say I am perfectly happy with it. Usually, as an artist, you pick on your work...this should have been like this...that should have gone like that...but for this cake I'm perfectly happy. I really wouldn't change a thing.
This week wasn't just Miss Jilly's Birthday but also Miss Sarah's! I'll share her special cake with you next week!!! Happy Birthday to both my granddaughter and my niece. I'm so happy I got to make these cakes for your special days!
Cat
Sunday, August 12, 2012
Happy Sunday! Well, you can see by the photo above how I spent my week...yup, making a LOT of sugar flowers! Every now and then I have to take a break from client orders and work on improving my caking skills. This was just such a week.
Awhile back I was going through my Demo Cake inventory and realizing that I needed to cull out the older cakes and put in some new ones that show off the newer skills or more up to date looks than the others. So out of the 12 I had on the shelf I kept only 3. My plan is to slowly add new Bridal Shower and Wedding cakes to my inventory so that Brides can see, up close, the type of work I do at the yearly Bridal Faires.
So I started thinking up new designs. I usually use the women in my life and family as inspiration for these demo cakes. I pretend they are my client and I design a cake to fit into a theme that I think would fit their personalities. About this time my niece mentioned that I "could" make one of those cakes based on her. So I did.
The design process isn't so different for Demo Cakes as it is for an actual client. First I meet with the client, get an idea of who she is, if this is for a Bridal Shower, or who the couple is together, if it's for a Wedding Cake, along with finding out what their dream cake would be for these occasions or what the theme for the event is already set to be.
For Nikki's Demo Cake I thought about who she is as a person. She is very "girly", bright, cheery and colorful...both in dress and in personality. But she's a bit scattered too. I think of her like a hummingbird, always flitting here or there but always in a cheery way. She spends a good deal of her life making other peoples lives easier and happier. Lastly, Nikki loves flowers. She is one of those moms who makes sure her kids stop and smell the roses, or peonies, or poppies or daisies...you get the idea. So almost immediately the idea of a cake with a waterfall of all different types of flowers came to mind.
Now here is where the designing process is considered very "organic"...meaning that I think on the fly when it comes to the design. Once again, not a different process from when I meet with a client. After setting the theme we discuss cake shape. You would be surprised how many people are stuck in the "round cake" rut. It is always a teeny bit overwhelming when I point out that there are square, oval, teardrop, rectangular and hexagonal cakes out there too. Nikki is no ordinary girl but she's not so cutting edge as to go with a teardrop design so I went with the hex shape. Still in the round idea range but with just a little more style.
When it came to making the flowers I picked out her favorite rose, the pink ones, and then researched other flowers in the color range I wanted to display. I knew I wanted to go from very dark purples, reds and blue to very bright yellows, oranges and light blues. I learned to make a few new flowers on my way. The bright blue aster was my very favorite! Delicate little petals but I simply love the way it looks. Even after I finished making a ton of flowers, estimating how many I needed for each tier, I found that when it came to placing them onto the cake I didn't have quite enough. So two hydrangea flowers were made to bring a bit more purple to the front of the cake. When placing flowers onto a cake you really need to take your time and make sure to let your flowers create the final picture you want to see. This means not letting yourself get too stuck in your original design. My original design had the Black-eyed Susan on the top of the cake, the white daisies on the sides and the dahlia on the front. Until I went to actually place it that way and decided that those flowers needed to be in completely different places!
Now for a "secret" you can use in your own cakes...even just that every day end of dinner cake. For the trim on both tiers I simply rolled out more white fondant and cut 1 inch strips on a grid backed mat. I kept the strips on the grid and, using that grid, evenly spaced out circle cut outs down each strip. Then I cut out little yellow flowers, made them into bowl flowers by pressing down in the middle of each one into a flower making sponge with a small ball tool and then, after putting the trim onto the cake, I pressed one flower into each hole in the trim. Then I followed that by adding in candy pearls for the center of each flower. The holes in the trim strip allowed the flower to set into the side of the cake and lay flat against it, thus adding design but not getting in the way of the other decorative flowers. This also means when you cut your cake you would still have flowers on each slice after removing the decorative ones making for a very pretty presentation on the table.
Check out our Cherry Party Blog tomorrow for the Bridal Shower party design that matches today's cake!
Next week we have a Beauty and the Beast cake for a 3 year old...I'll share that one Sunday night!
Cat
Awhile back I was going through my Demo Cake inventory and realizing that I needed to cull out the older cakes and put in some new ones that show off the newer skills or more up to date looks than the others. So out of the 12 I had on the shelf I kept only 3. My plan is to slowly add new Bridal Shower and Wedding cakes to my inventory so that Brides can see, up close, the type of work I do at the yearly Bridal Faires.
So I started thinking up new designs. I usually use the women in my life and family as inspiration for these demo cakes. I pretend they are my client and I design a cake to fit into a theme that I think would fit their personalities. About this time my niece mentioned that I "could" make one of those cakes based on her. So I did.
The design process isn't so different for Demo Cakes as it is for an actual client. First I meet with the client, get an idea of who she is, if this is for a Bridal Shower, or who the couple is together, if it's for a Wedding Cake, along with finding out what their dream cake would be for these occasions or what the theme for the event is already set to be.
For Nikki's Demo Cake I thought about who she is as a person. She is very "girly", bright, cheery and colorful...both in dress and in personality. But she's a bit scattered too. I think of her like a hummingbird, always flitting here or there but always in a cheery way. She spends a good deal of her life making other peoples lives easier and happier. Lastly, Nikki loves flowers. She is one of those moms who makes sure her kids stop and smell the roses, or peonies, or poppies or daisies...you get the idea. So almost immediately the idea of a cake with a waterfall of all different types of flowers came to mind.
Now here is where the designing process is considered very "organic"...meaning that I think on the fly when it comes to the design. Once again, not a different process from when I meet with a client. After setting the theme we discuss cake shape. You would be surprised how many people are stuck in the "round cake" rut. It is always a teeny bit overwhelming when I point out that there are square, oval, teardrop, rectangular and hexagonal cakes out there too. Nikki is no ordinary girl but she's not so cutting edge as to go with a teardrop design so I went with the hex shape. Still in the round idea range but with just a little more style.
When it came to making the flowers I picked out her favorite rose, the pink ones, and then researched other flowers in the color range I wanted to display. I knew I wanted to go from very dark purples, reds and blue to very bright yellows, oranges and light blues. I learned to make a few new flowers on my way. The bright blue aster was my very favorite! Delicate little petals but I simply love the way it looks. Even after I finished making a ton of flowers, estimating how many I needed for each tier, I found that when it came to placing them onto the cake I didn't have quite enough. So two hydrangea flowers were made to bring a bit more purple to the front of the cake. When placing flowers onto a cake you really need to take your time and make sure to let your flowers create the final picture you want to see. This means not letting yourself get too stuck in your original design. My original design had the Black-eyed Susan on the top of the cake, the white daisies on the sides and the dahlia on the front. Until I went to actually place it that way and decided that those flowers needed to be in completely different places!
Now for a "secret" you can use in your own cakes...even just that every day end of dinner cake. For the trim on both tiers I simply rolled out more white fondant and cut 1 inch strips on a grid backed mat. I kept the strips on the grid and, using that grid, evenly spaced out circle cut outs down each strip. Then I cut out little yellow flowers, made them into bowl flowers by pressing down in the middle of each one into a flower making sponge with a small ball tool and then, after putting the trim onto the cake, I pressed one flower into each hole in the trim. Then I followed that by adding in candy pearls for the center of each flower. The holes in the trim strip allowed the flower to set into the side of the cake and lay flat against it, thus adding design but not getting in the way of the other decorative flowers. This also means when you cut your cake you would still have flowers on each slice after removing the decorative ones making for a very pretty presentation on the table.
Check out our Cherry Party Blog tomorrow for the Bridal Shower party design that matches today's cake!
Next week we have a Beauty and the Beast cake for a 3 year old...I'll share that one Sunday night!
Cat
Subscribe to:
Posts (Atom)