Happy Sunday! This past week brought two fun cakes. The first one I spotlighted last Sunday so here is the second cake! For those who are wondering what the heck this is, well, it's from a T.V. show called Dr. Who. In the show, the Dr. flys all over the place through space and time...he uses the TARDIS to do this. So this is his space and time machine!
I know, I know, but what about copyright? Here is the groovy thing about this cake. It's just a Kent Police Box. Yup, these exist in real life in the UK. As real Police Boxes. So while we know that this is "Dr. Who" there is no copyright on a Kent Police Box. I was as thrilled as can be when I found this out!
Now, how to make this. It was certainly not easy and it was all due to the fondant. As I have mentioned before, I don't make my own red, black or blue fondant. It takes too much dye which changes the taste too much. Duff's fondant, comes in all sorts of wonderful colors and tastes wonderful too so when I need any of those three above mentioned colors I go to Duff's. However...and here is the sticking point...Duff's is really really...did I mention "really"?....SOFT. When covering a cake or making snakes for filigree it is a wonderful thing to work with. It's smooth and soft and wonderful. Except when you need it to be stiff. Then it's a nightmare to work with. But here is how I made do.
I started off with a 10x10x2 inch cake and cut it directly in equal halves. Then I filled it, stacked it and crumb coated it as always which then made it a 10x5x5 inch cake. In this case it was a yummy marble cake with vanilla buttercream filling. Then I started out covering each side of the cake with a thin panel. Knowing how soft the fondant is I wanted to give it a bit more base for me to work upon. I also had the idea that I could put the "doors" on and then mark the panels with it on the cake. Nope. Once I had the base layer of fondant on the cake I added the thicker "door" layer. Unfortunately the first time I tried to emboss a panel onto the door the cookie cutter slid right through the soft fondant to the crumbcoat layer. After three tries at this I gave up and made the doors with the panels on a matt and then attached those to the cake. This meant that while the embossing went well, the attaching left for some not so straight lines. After working on this for 2 hours I was happy with a few crooked lines! LOL!
Once I got the paneled doors on I did cut out the top sections for the windows, added white fondant in place of the blue and then used very thin strips to frame the "windows". For the base I just cut a slightly larger "slab" of fondant so it would stick out a bit and then trimmed the entire frame with more thick strips. Finally I was to the top. I didn't want to make that out of cake so I decided to mold the fondant. Yes, I'm a bit slow and figured this would be easy. Nope. Not so. Why? You guessed it, the fondant is SOFT. UGH! Ok, so I very slowly took my time, laid down the base slab and then started molding the top "hat" looking piece. I finally had to make it taller and thinner than I wanted it to be because the soft fondant kept settling as it dried a bit. I let it sit for 3 hours and then added it to the top of the cake and then, like the doors and base, trimmed it out with some thick strips. The light at the top was fairly easy. I rolled out an "egg" of white fondant then gently tapped one end flat. Then I put a few crisscross straps of black as the "cage" for the light and finally a bit of blue on top for the cap. I used a toothpick on the flat end to stick it into the top "hat" part of the building. I then used a thick snake of black fondant to add the number 6 to the bottom of the TARDIS and some thinner snakes to spell out the wording on the cake board.
Here came the hardest part. The signs. I have a Cricut Cake machine. This cuts out wonderful letters for me...until you get under 1/2 inch. Then I have to pipe any lettering I need. I have mentioned before that this is my weakness when it comes to caking. I'm not great at piping lettering. I seriously dreaded doing this piping so it was the very very last thing I did. The "big" letters are only a quarter of an inch tall and the little ones about 1/16th of an inch tall. So I rolled out the big blue slab base for the sign and added that to the cake. Then rolled out a slightly smaller piece of black fondant and let it set out and dry up a bit. The last thing I wanted to do is have that black piece be too wobbly when I went to place it on the cake and have all my lettering crack! So let this piece get really hard. I added a ton, not literally, of tylose to my black to make it really firm before rolling it out. Once I could pick it up without it bending I took a deep breath and began piping...and got it on the FIRST TRY! Yup, I was estatic...right until I put it on the cake and smudged a letter and then had to repipe that letter on the cake. SIGH. Things don't always go perfectly. The really sad news is that I had three, yes, three of these identical signs to pipe and the front sign to pipe as well. It was a long afternoon.
As always, the payoff was seeing the birthday girl's face when she saw her cake, watching her pull everyone over to see it as they arrived for the party, and hearing all of her friends ooooo and ahhhh over it. Worth every second of soft fondant and piping that I went through.
Happy Birthday again Sarah! I know you had a wonderful time and I am so happy you loved your Dr. Who TARDIS cake!
Next week I have a totally adorable Shower Cake to share with you! See you then!
Cat
Sunday, August 26, 2012
Sunday, August 19, 2012
Happy Sunday! This week brings a very special cake for a very special little girl...our granddaughter, Jillian. Jilly turned 3 this week. As you can see, we are a Disney family and she is a huge Beauty and the Beast fan!
Her cake is what we call a "background" cake. Since the figures are Disney copyrighted I made a cake for them to sit upon and around that gave the "feel" of the animation. Of course, being for a family member, I'm not selling this cake so, according to copyright law, I could have made the figures. But I thought, what if someday a client wants the same cake? I wouldn't be able to do that for them. So I figured Jilly would love the play set for after the party and this way I'd be able to work within the copyright law if I made a similar cake later on for a paying client.
Several of the pieces, along with the play set, were done before making the cake. The rose, dome and the library shelves had to be done days ahead in order to allow them to dry before assembly. The shelves were hand painted on white fondant. It was a fun challenge. It is harder to make straight lines that are not perfectly straight up and down than you may think. I wanted the books to look as close to the real thing as I could get in miniature. But books don't sit in a bookshelf straight up and down. They lean from side to side a bit. As I said, it was a fun challenge. It also took almost a full day to do this work. A good example of the level of artistry when you hire a designer as well as a good example on why this type of cake costs more than a supermarket cake. I let the shelves dry overnight against an 8 inch form and then the next day formed the shelf moulding for the bottom of the bookcase. I painted that and allowed it to dry for a full day. In the meantime I took a regular rounded juice glass and turned it upside and added the fondant "finial" to the top, painted it gold and let it dry.
The cake underneath is lemon chiffon and is filled with vanilla buttercream. The fondant is colored vanilla marshmallow fondant. My goal is always that the cake inside tastes as good as the outside looks. I can tell you from the piece I had at the party that it is really good cake!
When it came to assembling I draped over the brighter color of fondant to meet at the edge of the front and then drape around the sides and back. Then I set on the library shelves. I did not attach these to the cake with water. I want to be able to easily remove them when it comes time to cut the cake. I then rolled out rectangles of the bright fondant and draped it around the edges, like curtains, of the bookcase. I started with that edge and did the same type of draping around one side and then the other side, leaving the back drape for last. This is so I could size the back drape to fit. If I needed to be 3 inches long or 5 inches long or 4.5 inches long I could adjust as needed without ruining the spacing or look of front of the cake. After those had set for a bit I added the darker shade of yellow to the drapes. Finally I used a flower cutter to cut out the moulding pieces under the roses. Lastly I used the royal icing roses, set on toothpicks, at each join to add another layer of decor as well as another layer of stability at the joins.
Finally it was time to do the cake topper. And here is where tragedy struck. A few weeks back I did a whole blog about making a sugar rose. Unfortunately when I was measuring how tall the rose could be inside the dome I slipped and the rose hit the dome...and shattered. Yup, shattered. Fortunately I had more of the royal icing roses, and a good example of why I always make more than I think I will need, so I was able to remove the broken sugar rose and, using the same stem with leaves, attach a new calyx and a royal icing rose and still have one for the center of my cake! Whew!
At last I was able to place the figures and the sparkly 3 on the cake for a finished view of Jilly's Birthday Cake! This is one of the few cakes where I can say I am perfectly happy with it. Usually, as an artist, you pick on your work...this should have been like this...that should have gone like that...but for this cake I'm perfectly happy. I really wouldn't change a thing.
This week wasn't just Miss Jilly's Birthday but also Miss Sarah's! I'll share her special cake with you next week!!! Happy Birthday to both my granddaughter and my niece. I'm so happy I got to make these cakes for your special days!
Cat
Her cake is what we call a "background" cake. Since the figures are Disney copyrighted I made a cake for them to sit upon and around that gave the "feel" of the animation. Of course, being for a family member, I'm not selling this cake so, according to copyright law, I could have made the figures. But I thought, what if someday a client wants the same cake? I wouldn't be able to do that for them. So I figured Jilly would love the play set for after the party and this way I'd be able to work within the copyright law if I made a similar cake later on for a paying client.
Several of the pieces, along with the play set, were done before making the cake. The rose, dome and the library shelves had to be done days ahead in order to allow them to dry before assembly. The shelves were hand painted on white fondant. It was a fun challenge. It is harder to make straight lines that are not perfectly straight up and down than you may think. I wanted the books to look as close to the real thing as I could get in miniature. But books don't sit in a bookshelf straight up and down. They lean from side to side a bit. As I said, it was a fun challenge. It also took almost a full day to do this work. A good example of the level of artistry when you hire a designer as well as a good example on why this type of cake costs more than a supermarket cake. I let the shelves dry overnight against an 8 inch form and then the next day formed the shelf moulding for the bottom of the bookcase. I painted that and allowed it to dry for a full day. In the meantime I took a regular rounded juice glass and turned it upside and added the fondant "finial" to the top, painted it gold and let it dry.
The cake underneath is lemon chiffon and is filled with vanilla buttercream. The fondant is colored vanilla marshmallow fondant. My goal is always that the cake inside tastes as good as the outside looks. I can tell you from the piece I had at the party that it is really good cake!
When it came to assembling I draped over the brighter color of fondant to meet at the edge of the front and then drape around the sides and back. Then I set on the library shelves. I did not attach these to the cake with water. I want to be able to easily remove them when it comes time to cut the cake. I then rolled out rectangles of the bright fondant and draped it around the edges, like curtains, of the bookcase. I started with that edge and did the same type of draping around one side and then the other side, leaving the back drape for last. This is so I could size the back drape to fit. If I needed to be 3 inches long or 5 inches long or 4.5 inches long I could adjust as needed without ruining the spacing or look of front of the cake. After those had set for a bit I added the darker shade of yellow to the drapes. Finally I used a flower cutter to cut out the moulding pieces under the roses. Lastly I used the royal icing roses, set on toothpicks, at each join to add another layer of decor as well as another layer of stability at the joins.
Finally it was time to do the cake topper. And here is where tragedy struck. A few weeks back I did a whole blog about making a sugar rose. Unfortunately when I was measuring how tall the rose could be inside the dome I slipped and the rose hit the dome...and shattered. Yup, shattered. Fortunately I had more of the royal icing roses, and a good example of why I always make more than I think I will need, so I was able to remove the broken sugar rose and, using the same stem with leaves, attach a new calyx and a royal icing rose and still have one for the center of my cake! Whew!
At last I was able to place the figures and the sparkly 3 on the cake for a finished view of Jilly's Birthday Cake! This is one of the few cakes where I can say I am perfectly happy with it. Usually, as an artist, you pick on your work...this should have been like this...that should have gone like that...but for this cake I'm perfectly happy. I really wouldn't change a thing.
This week wasn't just Miss Jilly's Birthday but also Miss Sarah's! I'll share her special cake with you next week!!! Happy Birthday to both my granddaughter and my niece. I'm so happy I got to make these cakes for your special days!
Cat
Sunday, August 12, 2012
Happy Sunday! Well, you can see by the photo above how I spent my week...yup, making a LOT of sugar flowers! Every now and then I have to take a break from client orders and work on improving my caking skills. This was just such a week.
Awhile back I was going through my Demo Cake inventory and realizing that I needed to cull out the older cakes and put in some new ones that show off the newer skills or more up to date looks than the others. So out of the 12 I had on the shelf I kept only 3. My plan is to slowly add new Bridal Shower and Wedding cakes to my inventory so that Brides can see, up close, the type of work I do at the yearly Bridal Faires.
So I started thinking up new designs. I usually use the women in my life and family as inspiration for these demo cakes. I pretend they are my client and I design a cake to fit into a theme that I think would fit their personalities. About this time my niece mentioned that I "could" make one of those cakes based on her. So I did.
The design process isn't so different for Demo Cakes as it is for an actual client. First I meet with the client, get an idea of who she is, if this is for a Bridal Shower, or who the couple is together, if it's for a Wedding Cake, along with finding out what their dream cake would be for these occasions or what the theme for the event is already set to be.
For Nikki's Demo Cake I thought about who she is as a person. She is very "girly", bright, cheery and colorful...both in dress and in personality. But she's a bit scattered too. I think of her like a hummingbird, always flitting here or there but always in a cheery way. She spends a good deal of her life making other peoples lives easier and happier. Lastly, Nikki loves flowers. She is one of those moms who makes sure her kids stop and smell the roses, or peonies, or poppies or daisies...you get the idea. So almost immediately the idea of a cake with a waterfall of all different types of flowers came to mind.
Now here is where the designing process is considered very "organic"...meaning that I think on the fly when it comes to the design. Once again, not a different process from when I meet with a client. After setting the theme we discuss cake shape. You would be surprised how many people are stuck in the "round cake" rut. It is always a teeny bit overwhelming when I point out that there are square, oval, teardrop, rectangular and hexagonal cakes out there too. Nikki is no ordinary girl but she's not so cutting edge as to go with a teardrop design so I went with the hex shape. Still in the round idea range but with just a little more style.
When it came to making the flowers I picked out her favorite rose, the pink ones, and then researched other flowers in the color range I wanted to display. I knew I wanted to go from very dark purples, reds and blue to very bright yellows, oranges and light blues. I learned to make a few new flowers on my way. The bright blue aster was my very favorite! Delicate little petals but I simply love the way it looks. Even after I finished making a ton of flowers, estimating how many I needed for each tier, I found that when it came to placing them onto the cake I didn't have quite enough. So two hydrangea flowers were made to bring a bit more purple to the front of the cake. When placing flowers onto a cake you really need to take your time and make sure to let your flowers create the final picture you want to see. This means not letting yourself get too stuck in your original design. My original design had the Black-eyed Susan on the top of the cake, the white daisies on the sides and the dahlia on the front. Until I went to actually place it that way and decided that those flowers needed to be in completely different places!
Now for a "secret" you can use in your own cakes...even just that every day end of dinner cake. For the trim on both tiers I simply rolled out more white fondant and cut 1 inch strips on a grid backed mat. I kept the strips on the grid and, using that grid, evenly spaced out circle cut outs down each strip. Then I cut out little yellow flowers, made them into bowl flowers by pressing down in the middle of each one into a flower making sponge with a small ball tool and then, after putting the trim onto the cake, I pressed one flower into each hole in the trim. Then I followed that by adding in candy pearls for the center of each flower. The holes in the trim strip allowed the flower to set into the side of the cake and lay flat against it, thus adding design but not getting in the way of the other decorative flowers. This also means when you cut your cake you would still have flowers on each slice after removing the decorative ones making for a very pretty presentation on the table.
Check out our Cherry Party Blog tomorrow for the Bridal Shower party design that matches today's cake!
Next week we have a Beauty and the Beast cake for a 3 year old...I'll share that one Sunday night!
Cat
Awhile back I was going through my Demo Cake inventory and realizing that I needed to cull out the older cakes and put in some new ones that show off the newer skills or more up to date looks than the others. So out of the 12 I had on the shelf I kept only 3. My plan is to slowly add new Bridal Shower and Wedding cakes to my inventory so that Brides can see, up close, the type of work I do at the yearly Bridal Faires.
So I started thinking up new designs. I usually use the women in my life and family as inspiration for these demo cakes. I pretend they are my client and I design a cake to fit into a theme that I think would fit their personalities. About this time my niece mentioned that I "could" make one of those cakes based on her. So I did.
The design process isn't so different for Demo Cakes as it is for an actual client. First I meet with the client, get an idea of who she is, if this is for a Bridal Shower, or who the couple is together, if it's for a Wedding Cake, along with finding out what their dream cake would be for these occasions or what the theme for the event is already set to be.
For Nikki's Demo Cake I thought about who she is as a person. She is very "girly", bright, cheery and colorful...both in dress and in personality. But she's a bit scattered too. I think of her like a hummingbird, always flitting here or there but always in a cheery way. She spends a good deal of her life making other peoples lives easier and happier. Lastly, Nikki loves flowers. She is one of those moms who makes sure her kids stop and smell the roses, or peonies, or poppies or daisies...you get the idea. So almost immediately the idea of a cake with a waterfall of all different types of flowers came to mind.
Now here is where the designing process is considered very "organic"...meaning that I think on the fly when it comes to the design. Once again, not a different process from when I meet with a client. After setting the theme we discuss cake shape. You would be surprised how many people are stuck in the "round cake" rut. It is always a teeny bit overwhelming when I point out that there are square, oval, teardrop, rectangular and hexagonal cakes out there too. Nikki is no ordinary girl but she's not so cutting edge as to go with a teardrop design so I went with the hex shape. Still in the round idea range but with just a little more style.
When it came to making the flowers I picked out her favorite rose, the pink ones, and then researched other flowers in the color range I wanted to display. I knew I wanted to go from very dark purples, reds and blue to very bright yellows, oranges and light blues. I learned to make a few new flowers on my way. The bright blue aster was my very favorite! Delicate little petals but I simply love the way it looks. Even after I finished making a ton of flowers, estimating how many I needed for each tier, I found that when it came to placing them onto the cake I didn't have quite enough. So two hydrangea flowers were made to bring a bit more purple to the front of the cake. When placing flowers onto a cake you really need to take your time and make sure to let your flowers create the final picture you want to see. This means not letting yourself get too stuck in your original design. My original design had the Black-eyed Susan on the top of the cake, the white daisies on the sides and the dahlia on the front. Until I went to actually place it that way and decided that those flowers needed to be in completely different places!
Now for a "secret" you can use in your own cakes...even just that every day end of dinner cake. For the trim on both tiers I simply rolled out more white fondant and cut 1 inch strips on a grid backed mat. I kept the strips on the grid and, using that grid, evenly spaced out circle cut outs down each strip. Then I cut out little yellow flowers, made them into bowl flowers by pressing down in the middle of each one into a flower making sponge with a small ball tool and then, after putting the trim onto the cake, I pressed one flower into each hole in the trim. Then I followed that by adding in candy pearls for the center of each flower. The holes in the trim strip allowed the flower to set into the side of the cake and lay flat against it, thus adding design but not getting in the way of the other decorative flowers. This also means when you cut your cake you would still have flowers on each slice after removing the decorative ones making for a very pretty presentation on the table.
Check out our Cherry Party Blog tomorrow for the Bridal Shower party design that matches today's cake!
Next week we have a Beauty and the Beast cake for a 3 year old...I'll share that one Sunday night!
Cat
Sunday, August 5, 2012
Happy Sunday! As promised I am bringing you another tutorial! This time it's all about Bears! I have a Bear Themed Baby Shower coming up and this cute little bear is part of the decorations on the cake. What cute bear? Well, follow along and you will see how he's made....or just skip to the bottom of this page to get a peek! LOL!
I set the lighter of the two balls back into a bit of plastic wrap so it wouldn't dry out and then divided the larger ball into it's pieces. One for the body, one for the head (and ears), two for legs and two slightly smaller ones for arms.
Then I rolled out the body. I wasn't too worried about the "seam" lines that happen when you roll fondant because I knew I was texturing the bear later. I made the body sort of oval and then, using my thumbs, marked where I wanted the legs and arms.
Then for the head. I rolled out a big ball and flattened it out. Nice and round...like a teddy bear head.
I rolled the legs into small logs that had one end fatter than the other. Then I tapped that end down on my mat to make it flatter. Using this tool I used one end to make the foot mark and the other end to make the toes markings.
I did exactly the same thing to the arms. They are thinner and shorter than the legs but have the same markings.
I brought out the little light brown fondant ball at this point to make the pads. I needed one for the face, one for the belly, two for the feet and two for the arms.
The one for the face I rolled into a ball and then flattened it out to sort of a triangle. Then using the same tool I used on the feet I added a nose line and a mouth and eyes. The nose is actually a little round candy that was stuck on with a little tylose glue. This is made from a little bit of warm water and powdered tylose.
Next I added on the pads by rolling them up, flattening them out to about the thickness of a nickle and then using a piping tip, cut out the circles. Then I spread them out gently to fit the pads of the arms and feet. Finally I rolled out the belly pad and used an oval cutter to cut it out before placing it on and adding a belly button.
Now for the ears. For those you make little balls and when you flatten them out you sort of push down, leaving one edge thinner than the other. Then I used a small ball tool to make the center indention.
I used toothpics at each join. For the arms, the legs, the head and the ears. I insert the toothpic into the body, add tylose glue and then stick on the part. But for the ears I do it just a bit differently. For the ears I stick in the ends of a toothpick, sort of like pre-drilling the hole.
Then I insert the pointy end of the toothpick into the ear and sort of wrap that thinner edge around the pic. This is not the time for perfectly round ears. His ears are part of his "personality" so make them a bit uneven and different from eachother. Then I put glue where I want the ears to sit, in the pre-drilled holes, and place the ears there.
The last thing I did was use a scalloping tool to lightly "scratch" in fur for our bear. For the face I only used it to make a tuft of hair over the eyes and on the cheeks but then scratched away on the back of the head and all over the body. Then I added a bit of black food dye to the eyes with a broken toothpic. Just to give them a bit more depth and color.
The final touch was to give him some pad marks on his hands and feel by using that same small ball tool that I used on the ears and gently pressing down into the pad.
Now here is the funny part. Whenever I make a figurine I feel like they grow a personality and a name at the same time. These figures are never "it" but always, from the beginning, a "he" or "she". This bear is so very clearly a "he" to me. So everyone, I'd like you to meet Rudy. Rudy the Bear, welcome to the world!
See y'all next week! There is a Bridal Shower cake on tap that I can't wait to share with you all!
Cat
Sunday, July 29, 2012
Happy Sunday! As promised today, I will be working on a sugar rose.
I have an upcoming cake that is a "background cake" for Beauty and the Beast. I have the figurines already purchased and ready to go on the cake, now I just need the cake!
The cake topper for this cake will be "The Rose". Because it will be "suspended" under a dome I need the rose to be rock hard before I assemble the topper piece...thus, even though the cake is not due till the 18th, I need to start work on the rose now. And here is the reason...
I love using Duff's Fondant, bought at Michaels with their 40% off coupon of course, but it is a very "soft" fondant. You have to make adjustments in your timeline in order to get it to dry out enough.
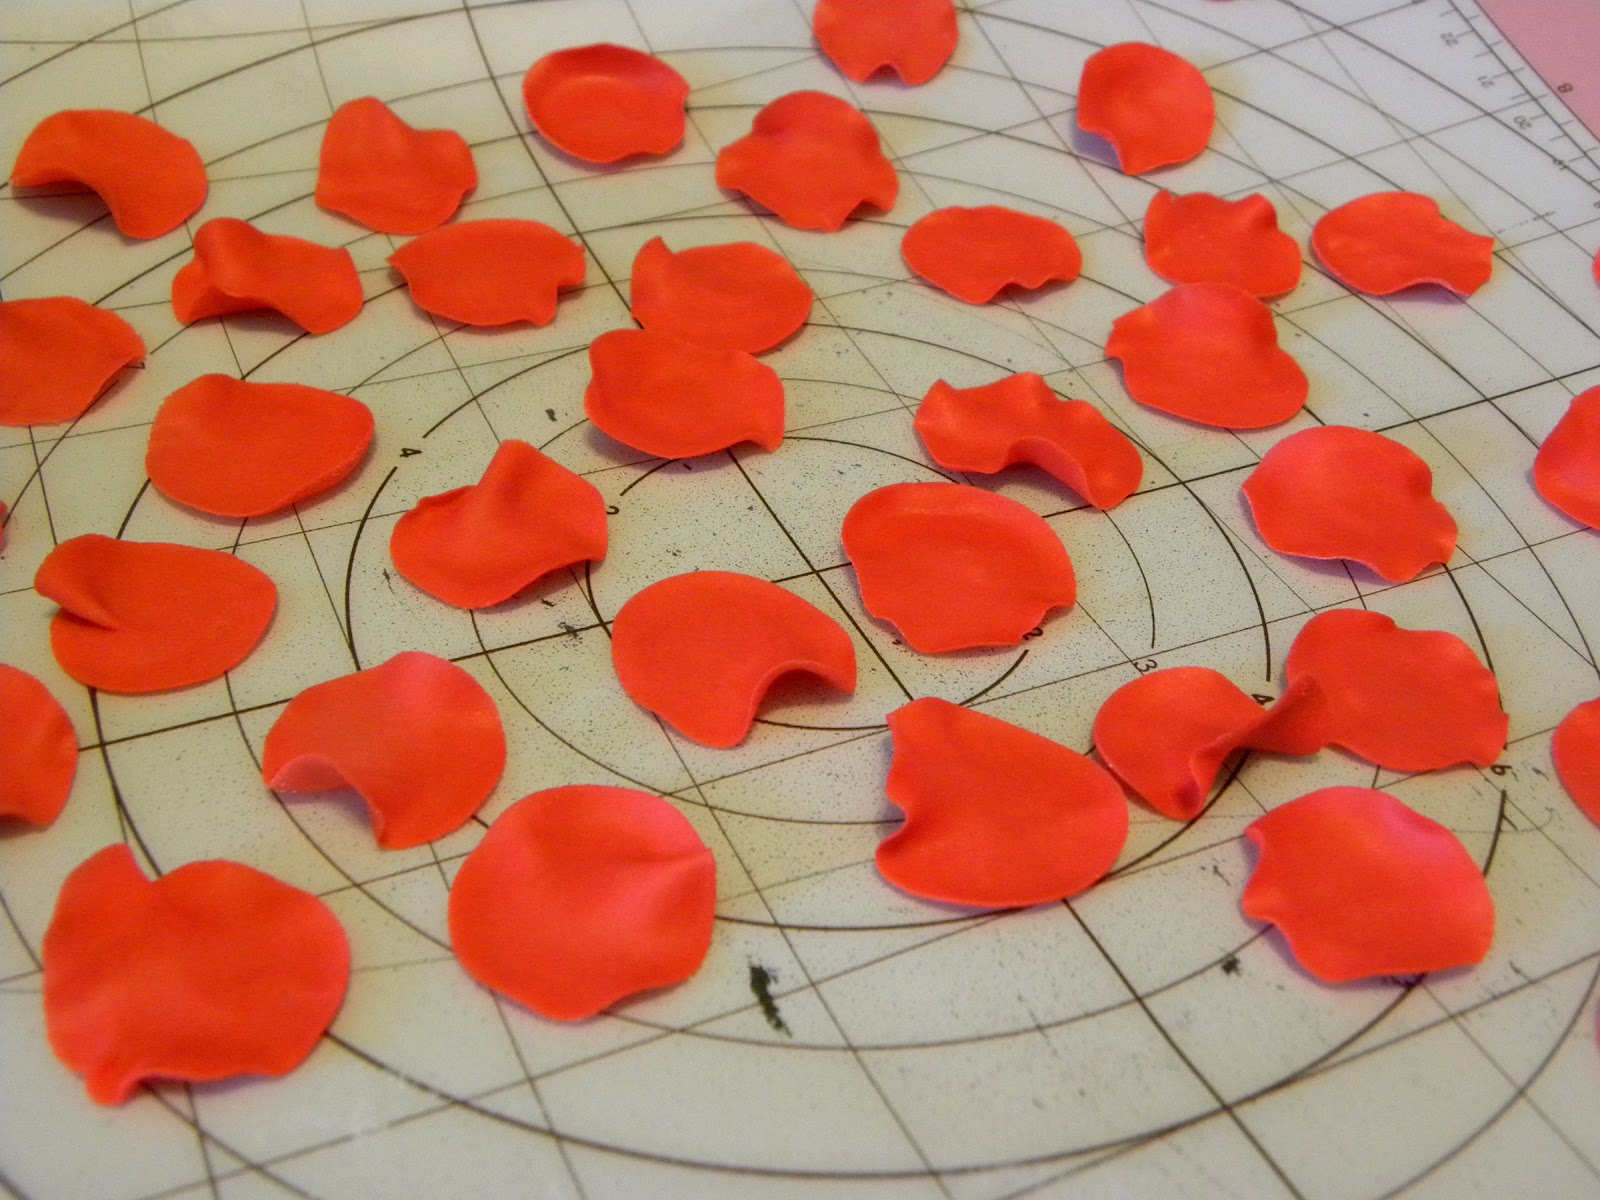
The first thing you have to do is add tylose or gumpaste. I prefer tylose and use about a teaspoon for a small amount like this. I know, I know, it seems like a lot of tylose for such a small amount of fondant but this is VERY soft fondant...it needs the tylose or you will be waiting days for the petals to dry up enough just to be able to use them!After kneading the tylose in very well I then roll out the fondant to about the thinness of a dime. The top of this cake is only 6 inches so I have to make sure the rose isn't too big for it. Normally I use round cutters but a piping tip worked perfectly for this size of petal.
Once I cut them all out and removed the excess fondant I used this "ball tool" above to start ruffling the edges.
I use a thin foam mat and begin, in a circular motion, from the middle of the circle to the outside edges lightly pushing out and down. As the fondant gets thinner it will begin to ruffle.
For this rose I cut out about 30 rounds. This is for two reasons. One is that this is a very compact rose style and you never know when you will go to use a petal and it will tear or bend wrong or break so you should always have back up petals just in case. I ended up using about 25 out of the 30.
Next I made up my "glue". This is just tylose sprinkled over water and then mixed well and allowed a bit of time to "gell" up. When you first stir it into the water it will look "clumpy" like it didn't actually mix in well. Give it a few moments then stir it again. You will see it start to get clear and gell like in texture. Add more tylose or more water to get the consistency of white glue.
Next I cut floral wire the length I think I need for my rose height. Then I rolled out a small center oval for my rose bud. I dipped the wire into the "glue" and then inserted this into the oval ball. I then let it set up for a small while. Do not rush this process or your rose will fall apart. Especially if you are working with soft fondant to begin with!
I then began the process of adding the first petals around the oval ball to create my rose bud. I just used a paint brush to brush on a bit of glue onto the petal and then put that around the oval ball.
This is the center of your rose. You will build up all the rest of your rose based on this center.
I added another petal and then let it set up for about an hour. If you rush this process then the weight of the petals and glue will drag your petals down and off your wire and just make a mess.
Then I gradually started to build up my rose till I had a smallish size group of petals. Once again I stopped and let it dry up for about an hour.
This is the last step before adding the final larger petals to the outside. I have about 25 petals onto the rose now and this is where I will let it set up overnight and dry.
Normally I would have hung my rose upside down on a wire rack but I need the wire on this rose to stay straight and not have a loop on the bottom of it. So I used a small box that I put a hole into the top for the stem to poke through and then used a shallow flower cup to hold the rose while it dried overnight.
The next morning I added the final big petals to the rose. I cut out 5 more circles of thicker fondant and then, using the ball tool, ruffled them out till they were the same thickness as the smaller petals. This makes for a uniform bottom of your rose.
You can now see the final rose with the larger petals framing the smaller ones. For whatever reason my camera photographed this more orange than red but it is truly red.
I then rolled out the green fondant and cut out the calyx, or bottom leaves, for the rose. I used a bit of glue in the middle and on part of the leaves and then stuck the wire right through the center. Then I started pressing the calyx to the rose.
I also used a leaf cutter to cut out the leaf shapes. Then used the ball tool to thin them out and give more realistic edges to each one but leaving the base of the leaf thicker than the tip. I used a veining tool to make the lines. Finally I used really fine wire that I inserted into the thicker end and then let them dry.
The first thing I did before moving on was to go look at a photo of the Beauty and the Beast rose so I could know how it is supposed to bend and where to put the leaves. It kinks in two places so I slightly bent the wire before starting with the floral tape. I began the floral tape on the top of the wire, where the wire meets the rose, and then wrapped it to the bottom and then back to the top again leaving a tail.
Then I wired the leaves onto the stem and continued taping the stem all the way to the bottom again helping to secure the wired leaves.
Here it is fully wired and wrapped.
Storing this rose, while it dries, was an interesting problem. I finally ended up getting chopsticks that are not broken apart but separated just enough to hold up the rose where it meets the taped wire and then suspended those off a bucket tall enough so the stem doesn't touch the surface and then weighted the chopsticks down to make sure they stay secure. They will sit like this until it is time to assemble the cake top. When that times comes, more wire will be inserted into the stem from the bottom and then down into a stir stick which will be into the cake. This will hold the rose a small way up from the surface of the cake to give the illusion of it being suspended under the dome on top of the cake.
Hope this tutorial helped you to understand how to make a sugar flower...or at least what goes into the process of making one. If you have ANY questions just leave them in the comments section and I'll do my very best to help!
See you next week with a sugar bear tutorial!
Cat
Sunday, July 22, 2012
Happy Sunday! This week is all about Baby Showers! The trend for showers in the past 5 years has been "bigger is better". Due to the economy lots of families are using showers and weddings as a replacement for family reunions. So the entire family gets invited, has a great "event" together, usually in an event space with catering, big cake, etc. But not all Mom's-to-be are wanting or needing a huge shower. It may just be a few friends around a coffee table in their mom's house. We don't believe that this means you should have to give up the adorable cake! Just scale it down a bit.
This "Cute as a Button" cake would be the perfect version if you only have 10 people to feed but still want an adorable cake to serve. It is a 6 inch cake which feeds 15 so you would have a few leftovers for later! Lemon chiffon with fresh strawberry preserves filling, covered in vanilla buttercream first and then fresh vanilla marshmallow frosting. So good that everyone will be going "MMMmmmmm" after you serve it!
The "secret" to this cake is the buttons. They are SO easy you are going to wonder why you haven't used this idea before! Just use a small round cutter in the size you want the buttons to be to cut out the colored fondant. Then use a slightly smaller cutter to gently press the inside circle down into the larger circle. Finally use either a fondant tool, which is what I did, or a skewer or a toothpick to make the holes in the buttons. Easy to use royal icing to crisscross them like they are "sewed" to the cake if you want to add that detail. We didn't do that here so you could see the holes clearly. SO easy! Just let them dry for a bit...I think we let them dry for about an hour...then place them on the cake with a bit of water for "glue".
Today's cake was a "teaching cake". I was teaching how to make fresh fondant and how to use it on a real cake. This did double duty for me as it allowed my student to learn a few new fondant techniques but also allowed my client, the next day, to sample one of my cakes at her tasting. Normally I teach on a styrofoam "dummy" cake which gives the student a more sturdy surface to learn upon but since I need the cake for a tasting I figured this was also a good way for the student to learn how to work with real cake as their base.
Normally, for small cakes such as shower cakes, I don't need to do a tasting. Chances are they are clients who have either attended an event and tasted my cake or have heard from clients how good the cake is and thus don't require a tasting. Wedding cake clients always get a tasting! However, this is a new client and she was dubious about the taste of fondant. All she had tasted, up to this point, is the type of fondant that some bakeries get from a tub. Now the problem with that is the tub could have been sitting on a shelf for months before it was purchased by the bakery and then sitting on the bakery shelves for awhile before it was used on your cake. Think about the taste of freshly baked bread compared to bread that you get at the store, sliced and in bags. The sliced bread tastes ok but the fresh baked bread is amazing! Always ask the bakery or the caker, that you use when their fondant was made. If it has been made in the past two weeks then it will still have that fresh taste to it. Any older and you start to lose that wonderful taste and texture of fresh fondant. I make my fondant the same week as the cake is made. So freshly baked cake with freshly made fondant. It makes all the difference in the world!
The other thing I do is use the best ingredients I can. Unless your health requires you to go gluten or sugar or dairy free, then this is not the time for substitutions. Let your weight loss wait a day and go for the treat. However if you DO have an allergic reaction to gluten, sugar or dairy, make sure to tell your baker. We do have ways to make your cake the way you need it and still taste good. As good as our full fat, dairy and gluten included cakes? Well, no, but still very very good. And everyone should be able to have cake!
See you next week! I am working on "piece work" the next two weeks. I have a few cakes that need figures or flowers so as I work on them I'll be taking photos so that you guys can have tutorials! I'll post the first one of these next Sunday!
Cat
This "Cute as a Button" cake would be the perfect version if you only have 10 people to feed but still want an adorable cake to serve. It is a 6 inch cake which feeds 15 so you would have a few leftovers for later! Lemon chiffon with fresh strawberry preserves filling, covered in vanilla buttercream first and then fresh vanilla marshmallow frosting. So good that everyone will be going "MMMmmmmm" after you serve it!
The "secret" to this cake is the buttons. They are SO easy you are going to wonder why you haven't used this idea before! Just use a small round cutter in the size you want the buttons to be to cut out the colored fondant. Then use a slightly smaller cutter to gently press the inside circle down into the larger circle. Finally use either a fondant tool, which is what I did, or a skewer or a toothpick to make the holes in the buttons. Easy to use royal icing to crisscross them like they are "sewed" to the cake if you want to add that detail. We didn't do that here so you could see the holes clearly. SO easy! Just let them dry for a bit...I think we let them dry for about an hour...then place them on the cake with a bit of water for "glue".
Today's cake was a "teaching cake". I was teaching how to make fresh fondant and how to use it on a real cake. This did double duty for me as it allowed my student to learn a few new fondant techniques but also allowed my client, the next day, to sample one of my cakes at her tasting. Normally I teach on a styrofoam "dummy" cake which gives the student a more sturdy surface to learn upon but since I need the cake for a tasting I figured this was also a good way for the student to learn how to work with real cake as their base.
Normally, for small cakes such as shower cakes, I don't need to do a tasting. Chances are they are clients who have either attended an event and tasted my cake or have heard from clients how good the cake is and thus don't require a tasting. Wedding cake clients always get a tasting! However, this is a new client and she was dubious about the taste of fondant. All she had tasted, up to this point, is the type of fondant that some bakeries get from a tub. Now the problem with that is the tub could have been sitting on a shelf for months before it was purchased by the bakery and then sitting on the bakery shelves for awhile before it was used on your cake. Think about the taste of freshly baked bread compared to bread that you get at the store, sliced and in bags. The sliced bread tastes ok but the fresh baked bread is amazing! Always ask the bakery or the caker, that you use when their fondant was made. If it has been made in the past two weeks then it will still have that fresh taste to it. Any older and you start to lose that wonderful taste and texture of fresh fondant. I make my fondant the same week as the cake is made. So freshly baked cake with freshly made fondant. It makes all the difference in the world!
The other thing I do is use the best ingredients I can. Unless your health requires you to go gluten or sugar or dairy free, then this is not the time for substitutions. Let your weight loss wait a day and go for the treat. However if you DO have an allergic reaction to gluten, sugar or dairy, make sure to tell your baker. We do have ways to make your cake the way you need it and still taste good. As good as our full fat, dairy and gluten included cakes? Well, no, but still very very good. And everyone should be able to have cake!
See you next week! I am working on "piece work" the next two weeks. I have a few cakes that need figures or flowers so as I work on them I'll be taking photos so that you guys can have tutorials! I'll post the first one of these next Sunday!
Cat
Sunday, July 15, 2012
Happy Sunday! I'm on vacation this week so I thought, with no cake to share, I would share another part of Caking...the filling! You can let your imagination fly when it comes to what to put between your cake layers. In fact, you can mix it up from tier to tier even, using the same cake flavor and different fillings!
The cake pictured above is actually a "cake favor". These were packaged up and given as favors for those attending a baby shower. The Mom to Be chose yellow cake with lemon glaze for each guest. I have a 3 inch pan so it was easy enough to bake the mini cakes quickly and then boxed them up in favor boxes tied with ribbon. So you don't even "need" a filling if you don't want to use one!
Glazes are really easy to do. Primarily powdered sugar and milk or juice, a glaze goes together quickly and inexpensively and is almost impossible to mess up. Here is my favorite recipe for this lemon glaze that has real lemon zest in it.
LEMON ZEST GLAZE
1 cup powdered sugar
2 tablespoon lemon juice
2 tablespoons lemon zest
Just mix the ingredients all together with a fork and pour over the freshly baked cake! It makes about a cup and a half so just double or triple the recipe as needed. This will make more than enough for an 8 inch round 2 inch high cake.
Something I do every year is make jam. I just finished this batch of strawberry jam and will be making apricot jam next week. I try to keep fresh jam around for the entire year and have been known to make up new jars when I get an order for a cake with this filling. The one thing you have to be aware of is that jam is very sweet so you have to pair it with a cake that isn't so sweet. I love using my apricot jam to fill a dark chocolate cake. The more bitter dark chocolate along with the sweet apricot is a joy that has to be tasted to be believed...and once you do, you will be hooked! Here is my favorite jam recipe!
Fresh Strawberry Jam
Copyright 2004, Ina Garten, All Rights Reserved
- Prep Time:
- 10 min
- Inactive Prep Time:
- --
- Cook Time:
- 20 min
- Level:
- Intermediate
- Serves:
- 2 pints
Ingredients
- 2 cups sugar
- 1 large lemon, zested and juiced
- 1 1/2 pints fresh strawberries, hulled and halved
Directions
Combine the sugar, lemon zest, and lemon juice in a small saucepan and cook over very low heat for 10 minutes, until the sugar is dissolved. Add the strawberries and continue to cook over very low heat for 20 minutes, until the strawberries release some of their juices and the mixture boils slowly. Cook until a small amount of the juice gels on a very cold plate. (I keep one in the freezer.) This is at about 220 degrees on a candy thermometer. Pour carefully into 2 pint canning jars and either seal or keep refrigerated.
A note about making jam. I choose to not use pectin (a preservative) in my jams. I like the fact that my fillings are all natural. To do this, however, you must can them properly. There are a lot of canning sites online that will walk you through this process but here is an extra tip. Often you will be told to just put the jam into the jars and refrigerate it...that you don't need to "process" it. I always process mine. This means that after you put the jam into your jars you then put them into a "water bath" (heavy duty pan filled almost to the top with hot water...submerge the jars all the way or to the lips after putting the lids on) and let them boil for about 15 minutes until the cap "pops". This is when you know your jam is sealed from air and bacteria. If, for some reason, the lid doesn't pop you will want to use that jam immediately. Otherwise you can leave the unopened jars in your refrigerator for up to six months. Once you pop the seal make sure you use the jam within 3 weeks.
Lemon curd is another wonderful filling to use when incorporated into your buttercream for the filling. This is not a recipe I have been able to master so far, but I keep trying. Instead I usually purchase a particular jarred English lemon curd from my local tea shop for this filling. So don't feel badly if you don't make your own fillings fresh. I prefer to use fillings from scratch because I want to keep additives and preservatives out of my cakes but it is not always possible. Just be choosy when you do select which jams to use. Try not to use sugar free (which often has some sort of chemical sweetener in it), use seedless and read the labels to keep the artificial additives down to a minimum.
Last word on fillings. When you are getting ready to use a filling like a jam or preserves, and I'll explain the difference in a moment, you will want to make sure that you make a ring of stiff icing to act as a dam between your filling and the outside of your cake. Just mix a bit of extra powdered sugar into your buttercream and then put that into a piping bag without a tip. Go around the outside of your layer and make a complete solid ring. Then put the filling inside the ring.
So, in case you were wondering, preserves are big chunks of the fruit with very little "sauce" used. Jam is where the fruit has been crushed during the process and more "sauce" is included with the fruit into the jars. Jelly is all sauce with the fruit pieces strained from the sauce before it is placed into the jars. This turns out looking see through in the end.
I hope you will be inspired to make your own fillings but, if not, then maybe just think outside of the box when choosing fillings for your next cake project!
Cat
Subscribe to:
Posts (Atom)