skip to main |
skip to sidebar
Happy Sunday! Hope you had a really wonderful St. Patrick's Day! Unfortunately most of our household got sick this weekend so we've been lying low and have postponed our dinner until Thursday. Fortunately the cake that was due this week was already done and photographed!
This 3 tiered Easter Cake is a demonstration on how you can use packaged decorations and cookie cutters to decorate a cake. Even if you haven't learned how to make and use fondant yet, you can still use some of the same tips and decorations on a buttercream iced cake!
Let's work from the top down. The "egg" topper is actually a egg shaped piece of fondant that I then covered with little cookie cutter flowers that I dusted with pearl dust and then attached with royal icing. Finally I put a dot of royal icing in the center of each one and placed pearl dragees into the icing. Green buttercream made for the perfect bed for the "egg" to rest on for the top of the cake.
The top and bottom tiers just use the same green buttercream and Cadbury Chocolate Eggs for trim. The middle tier uses this same trim along with eggs cut with cookie cutters out of different colored fondant and then mixed and matched with each other to make multi colored eggs for the cake. Finally I used little sprinkles shaped like bunny heads, chicks and sheep in the same colors as the eggs that I nestled into dots of buttercream on the cake.
Because I only fully decorated the center tier, the cake keeps a clean and uncluttered look to it. If you decorated each tier like the middle tier it would look incredibly busy and over decorated. If you just used the trim with the topper it might look too bare. If I were to use these ideas for a single tier of cake I would make the center tier but leave off the topper and just use a few of the little dusted flowers sprinkled on the plain white top instead.
If you are going to make a multi tiered cake like this one remember that structure is everything in a stacked cake. You want to have at least 5 dowels placed into each tier to support the upper tiers. The cakes do not actually support each others weight, the dowels do that. If you are going to transport your cake you may want to consider a long center dowel placed into the center from the top to the bottom of the cake. Lightly sharpen the tip of the long dowel and it should go right through the cake boards all the way to your bottom board or drum. This will give your cake a lot more stability and save you the time and trouble of having to stack and add your trim at the venue. I, personally, have a Cake Safe (www.cakesafe.com) that uses this same idea for transportation and has been a life saver, and cake saver, since I often have to transport stacked cakes up to 200 miles away.
If you find yourself in the position of having to travel such a long way to deliver a cake and you don't have a Cake Safe then just individually box each cake tier and stack them at the venue instead. Just make up a small kit with your tools and icing and give yourself at least an extra hour for stacking and trimming of the cake.
This week is our Cub Scouts Blue & Gold dinner so I'll see you next Sunday with photos of those cakes to share!
Cat
Happy Sunday! Thanks to the popularity of shows like Ace of Cakes and Cake Boss as well as shows like Cupcake Wars which has helped make cupcakes a hot ticket these little treasures have gotten to be quite popular for my clients. I have had several orders of "Dinner Party Cupcakes" this past year and I try to make them different each time.
These Mexican Hot Chocolate Dinner Party Cupcakes were ordered by a wonderful repeat client. She had taste tested this flavor during a cake consultation and fell in love. So when the occasion came up where she wanted cupcakes she knew exactly which ones she wanted!
What makes these special is the use of good dark chocolate, that has been grated into the chocolate batter, but also the cinnamon and red pepper added into the mix as well. Somehow the spices make the flavor of the dark chocolate just POP! You have the combination of the sweet vanilla buttercream, the caramel sauce, then the bite of the spices and the richness of the chocolate. It's sheer Heaven in four bites. YUM!
I see a lot of elegant presentations on some of those shows I mentioned before but, more often than not, I see some really interesting looking presentations that, well, to be honest, just wouldn't be all that fun to eat. A lot of elaborate cupcakes seem to focus all on how they look and not how it would actually feel to bite into it. So I thought I'd take a few moments to go over some of the items that are used for those presentations and why they visually work but wouldn't be a whole lotta fun to eat.
The first, and most popular, is sanding sugar. Just like it sounds, sanding sugar is sugar that has the same size and consistency of sand. Very popular for wedding cupcakes this season due to the sparkly "bling" factor that sanding sugar can bring to the finish. However, like sand, this isn't all that wonderful on the teeth to eat. So pretty to look at but not nice to eat. A better way to use sanding sugar, get the bling and not have to worry about how it tastes, is to add it to a fondant decorative piece, like a bow or ribbon, that can be removed before eating.
And while we are on the subject of fondant. I see quite a few designs that either have a covering of fondant like a "lid" on the cupcake or a large decoration, or several layers of decorations, on top made from fondant. The issue with the "lid" idea is that, again, while very pretty, the fondant tends to all come off in one piece when you bite into the cupcake. You wind up with a mouthful of fondant, a little buttercream and not much cake. When you find a cupcake covered in fondant decorations it's hard to know whether to eat the items or remove the items. I've witnessed this in person and find that the kids eat it all up while the adults end up with a tidy little pile of decorations on their napkins. Neither is great for your guests. A better idea would be to keep the icing simple and add fondant decorations to the tray that the cupcakes are presented upon. They get the same "cute" factor without feeling like they need to eat all of that sugar.
Last on my list is a little decoration called Candy. This has become very popular for cakes and cupcakes this past year. I've seen cupcakes covered in large pieces of candy, cakes covered completely in M&M's, "sprinkles" so large you would feel the need to pick them off and eat them first before biting into the cupcake. As with the fondant decorations, the kids eat every single sugary bite while the adults tend to pick at their food to get to the simple icing and cake. Having your guests feel the need to pick apart their food may not be the impression you want to leave...especially at a wedding.
My hope has always been to have my cakes look at least half as good as they taste. I never want to sacrifice taste for how pretty something looks...I'd rather sacrifice pretty. Because, in the end, the taste is what is going to have your clients keep coming back each time. If your cake doesn't taste good then the next time they will find another baker. I have a few clients say that I am their "cake lady" and I simply adore that. It makes me feel wonderful knowing that when it comes time to buy another cake, or cupcakes, that I will be the first on their list.
This upcoming week I will be sharing with you an Easter design along with our St. Paddy's Day dinner and dessert (no, it's not cake!). See you next Sunday!
Cat
Happy Sunday! Today was a Baby Shower for a long time client and friend, Tammy! We have worked a few events for her and her family so it was wonderful to see everyone today and treat them to a fun party and a cute cake.
This is their second baby and while having a boy would be nice, since they already have an adorable daughter, they chose not to find out if it is a boy or a girl. This means coming up with a theme that fits either and, of course, is totally cute! We ended up with a Rubber Ducky theme and it did, indeed, turn out to be very cute!
You will be able to see more photos on our Cherry Blog tomorrow afternoon: http://thecherryontopevents.blogspot.com .
So we decided to make the cake be a laundry basket filled with baby blankets and decorated with Rubber Duckies. The ducks and the handles were the only parts that were non-edibles. The cake was Lemon Chiffon cake with vanilla buttercream filling and then covered with more vanilla buttercream. The blankets were fondant.
The real challenge for this cake was it's height. At almost 6 inches from top to bottom and with it carved smaller at the base than top, it wasn't the most sturdy of cakes. I had dowels inserted in 6 places to help it make the journey to the venue but, even so, we held our breath all the way there till it was set on the cake table! Even with the construction of the basket weave, which tends to use more frosting which helps hold the structure together after it crusts, it was still wobbly. Made me really nervous but it made it!
We chose a serving tray so it wouldn't appear to be your "average" cake and I love the way it helps make it look like the basket is set onto grass. And I have to say that the "grass tip" is probably my favorite tip in the world. It's just so much fun to pipe with that I always save that detail for last. That way, even if the rest of the cake was a real challenge to pipe, the grass is just so much fun that it ends everything on a happy note!
Cutting this cake was a challenge as well. We ended up with tall slivers of cake, each about a half inch wide. I started working on a corner and worked my way around the cake which turned out to be a fairly good strategy. With carved cakes, or unusual sized cakes, you have to really think outside the usual cake box when it comes to cutting.
In the end, the client and her guests were delighted with the cake and the party and I heard several compliments during and after the party which is an extra payment for any caker!
This upcoming week brings Dinner Party Cupcakes! See you next Sunday!
Cat
Happy Monday! So sorry this one is a day late but last night was, after all, OSCARS! We have a party every year and celebrate it up big. More on that later.
Speaking of celebrating every year. This was my second year making a birthday cake for this special client! It was fun to sit down with her and let her design her heart out when it came to her cake. She loves Tiffany Blue and she loves Sterling roses. So I came up with this ultra feminine version of her favorite colors and her favorite flower.
The cake is a yellow vanilla cake filled with fresh strawberries and vanilla buttercream. Then I covered it with Tiffany Blue fondant and piped on dark purple filigree which I then embellished with candy pearls. Finally I added on a 75 petal sugar Sterling rose. She was simply delighted.
I love to feature cakes like this one because, while it IS an "average" 8 inch cake, it didn't have to be the "average" piped buttercream with shell border cake like you would get from the grocery store. The fun part of going to a cake designer is that you can have your "average" birthday cake be anything but average. There will be Big Birthday's in your life and for your loved ones, where you will want the Big Cake but every year you have your birthday and there is no reason to settle for an "average" cake when you can have something made especially for you!
As I mentioned, last night was our Oscar Party! This meant I was following a theme for the night. This year was "Night at the Movies" so the cake part of this had to fit in. What's better than Popcorn Cupcakes? No, that's not really popcorn. It's mini marshmallows!
I made the cupcakes...in this case just simple yellow cake cupcakes...and then I started on the marshmallows while waiting for the cupcakes to cool. The only baking tip here is that I knew I had the Cupcake Collars to go on these to cover up the actual baking liners but when people eat them they remove the collar and you do want a liner to match so I baked these in red and white baking liners.
Now the marshmallows. This is another one of those labor intensive decorating tips. I used 20 marshmallows per cupcake so it would look like a crowded box of popcorn. Each marshmallow was snipped with an X about 3/4 the way through it. I then "smooshed" each one so that the four corners of the marshmallow would shape more like popped kernels and finally dusted each of them with yellow luster dust. When I had all the marshmallows done for that cupcake I put a little bit of buttercream on it and randomly placed the "Popcorn" on top.
When I arrived at the party location I added the collars and set them out on the table. The guests had no idea that this was dessert! They just thought it was another form of popcorn holder! I have to say, that's one of the most fun parts of my job. When I can take cake and make it look like something that is not cake and have everyone believe that it's not cake...now that's FUN!
To see more Oscar Party ideas check out this week's Cherry Blog: http://thecherryontopevents.blogspot.com
More fun coming up this week. We are working a baby shower this weekend and I'm doing the cake as well! SO cute! Can NOT wait to share this one with you!
Cat
Happy Sunday! This week was, as you can imagine, full of Valentine's Day fun...you can see more of that tomorrow afternoon at our "Cherry Blog"
http://thecherryontopevents.blogspot.com/ . But this week, today actually, is also our younger daughters birthday. She is my partner in Cherry and also a caker so it can make it pretty hard to surprise her with new and unusual cakes for her birthday. Happy Birthday TORY!
This year I made her a Cherry Pie cake! She loves pie so I thought I'd make her a birthday cake that looks like pie! The cake is just a yellow cake that I baked in a pie pan. Then I covered it in vanilla buttercream and let that crust up for a few minutes. Then I tinted a little bit more buttercream with burgundy gel color and spread a very thin layer of that on top of the white buttercream. Next I used red decorating gel to put a thin film over the burgundy buttercream. Then I started working on the "cherries".
The cherries are simply red fondant that I added just a touch of violet gel color to darken the red up to a more natural cherry color. I rolled out enough fondant balls to pretty much cover the top of the "pie" making sure to vary the sizes and shapes and adding a little indent where the stem would be on a real cherry. I placed them one by one on the "pie" to get enough coverage and I placed them each at different angles.
I then put some of the red decorating gel on each of the "cherries" so it would look like they were swimming in the cherry filling. I added strips of fondant to make the lattice top and a fondant rope that I pinched (which is not as easy as it is with real pie dough!) at regular intervals. The last part was the handpainting. Using brown gel color mixed with vodka I painted on the first coat. The second coat I added in a little of yellow gel color to the brown and painted on another layer of color, making sure the edges were darker so it would look like it was a real baked pie.
The fun part was that I pretty much fooled her when she walked in the door and saw it. From a distance it truly looks like a real pie. It wasn't until she got up close enough to the pie that she realized something was "off" about it and it dawned on her that it wasn't a pie at all! LOL! That is truly the fun of my art when I can, even momentarily, have someone thinking that the purse, toolbox, tv, or, in this case, pie, isn't really anything but cake after all.
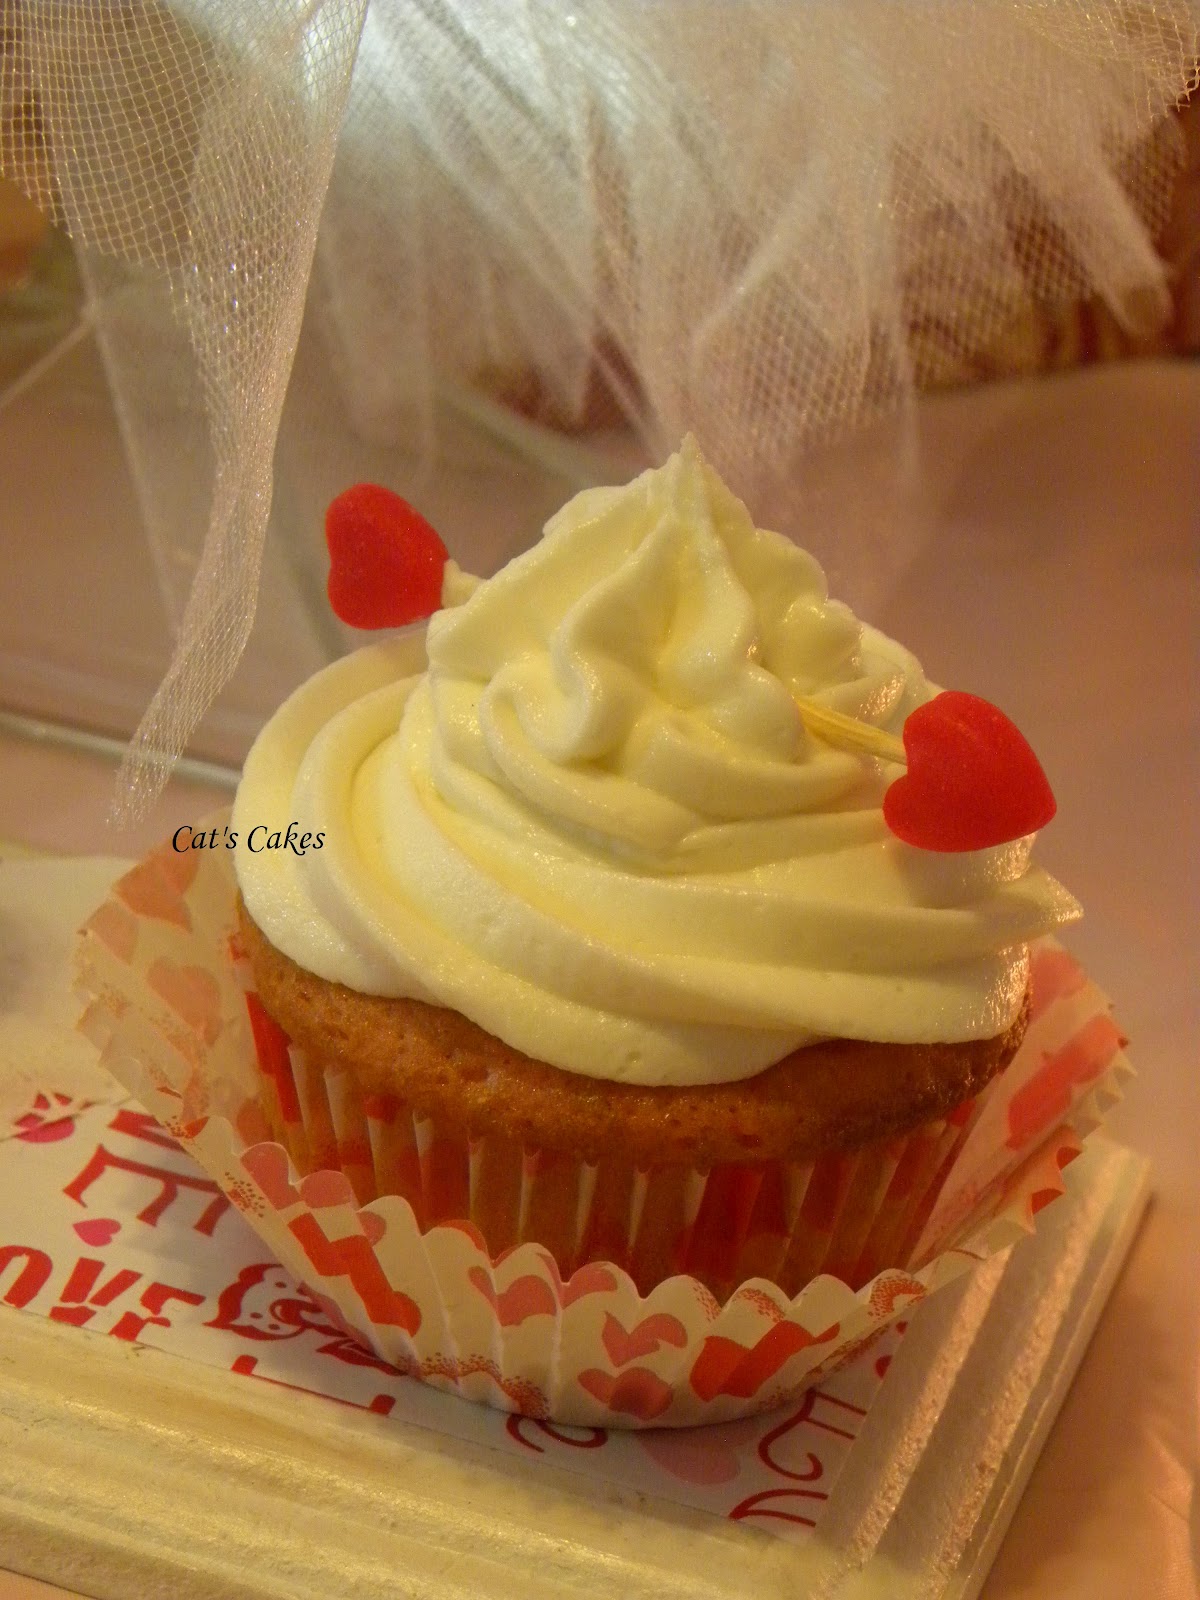
The Valentine's Day treats I made were actually a trio of desserts for the dinner party. The first of the three was a cupcake that was "pierced" with a fondant heart arrow. This is actually two fondant hearts cut out with a mini cookie cutter and then, while still soft, put onto a toothpick.
The next of the desserts is a White Chocolate Covered Strawberry. Temper your white chocolate and then dip your strawberries in and let them dry on parchment paper for a few minutes. Then, using a piping bag with a small writing tip, drizzle more white chocolate back and forth on the each strawberry. The final touch is gold large grain sugar. The perfect touch!
The last of the trio is a S'more Tart. I made graham cracker shells in these mini tart pans and baked them for a few minutes. Then I turned off the oven. I put three pink marshmallows into the shell and let them sit in the oven till they puffed up and slightly melted. Finally I put on a teaspoon of white chocolate and a little fondant heart into the center. To eat them you simply break them up with a fork and eat it like a cookie!
To see how the trio was presented on the table, and all the other decorations and treats for the Valentine's Day Dinner Party, make sure to check out "Cherry" tomorrow afternoon! Just go to:
http://thecherryontopevents.blogspot.com/
Also, though most of you have found this blog from our "Cherry" Facebook page, for those who haven't found us there you can visit by going to www.facebook.com/thecherryontopevents . There are daily tips, photos of all the cakes along with occasional treats given away. So stop on by and make sure to "Like" us!
See you next week here or tomorrow on our Cherry Blog!
Cat
Happy Sunday! With Valentine's Day just a few days away this Bridal Shower cake was a shoo-in for the Bride who loves Pink. I loved the fact that she's using mirrors on her table for the candles so I was able to use one of my surplus mirrors to display this cake!
This 8 inch Strawberry cake was filled with fresh strawberries and vanilla buttercream. I bet it will be gorgeous when cut and set out on her pretty pink, red and white heart decorated plates. What I love about this cake is that while it has the rose on top and hearts on the sides it's actually quite the architectural cake. So it wasn't just this little fluffy piece of pink, it actually has shape and structure. I love that.
It was, however, one of those cakes that takes tons of prep time. Days to make the petals for the huge rose and then dust it with pink luster dust and then more time to make the squares, which had to be totally dry and hard in order to put them onto the cake and then make the hearts and let them dry so they can be placed on the cake. But I have to say that I loved every step. It was fun to see how each piece came together on the finished cake.
Ok, so the tricks to share. The squares are cut using a square cutting set. Most people would cut out the big square and then use a smaller cutter to cut the inside out. But, for me, it is easier to cut out the small square and then use a bigger cutter to cut out a more even outside shape. Then I let them dry exactly where I cut them so that they will not lose their shape. The braids were made by using an extruder to make the long snakes of soft fondant then they are braided together and put right onto the cake with a little brush of water to hold them in place. You do not want to wait till these are dry because you want to be able to form them around the cake. The stripes are also put on while still soft so they can be placed over the edge of the cake smoothly. With those I brushed the line of water first and then laid the stripe down on the line of water.
Next week I will be able to share with you more Valentine's Day goodies! A few different types of desserts along with tutorials on how to make them!
Cat
Happy Sunday! This week we feature a beautiful little cake that could be for a Bridal Shower or maybe the top tier for a Wedding Cake but is, in fact, a very girly girl Birthday Cake for one of my favorite girly girl clients!
This 6 inch dark chocolate cake is filled with fresh buttercream icing and then covered in the same buttercream and decorated with 75 sugar Hydrangea leaves. Just enough cake for a small celebration of friends and family.
It seems like a rather simple cake but, of course, making the flowers started a week ago. It is a many stage process that starts out with fresh fondant being made for the flowers themselves. Once the fondant is ready, and there is a 12 hour waiting period before it's ready for use, I rolled out the sheet of fondant and used my hydrangea cutting set to cut and press the petals. These then have to set up for 12 hours and then I was able to gently fold them a bit to give them some movement like real flowers. Then they set up another 12 hours and I can finally begin the dusting process. In person they are a bit glittery but I used mat dusts to create the purple and blue colors and just a touch of the pink pearl dust to add the splash of pink and a little sparkle.

Each petal was first dusted with the pink in the centers. Then I went back over them with the purple and then the blue. This photo was taken right as I started the blue layer. I then went back over them again with purple here or there and finally finished them off with more of the pink. The wonderful thing about hydrangeas is that they are not all colored the same from petal to petal. The color variations is one of the reasons I find them to be so beautiful. They range everywhere from white to pink to blue to purple and every mix in between. I went with the purple variation. The next step is using water to set the candy pearls into the center of each petal. These set up again for about 6 hours and I was finally able to form them just a little more before letting them dry for 2 more days till solid. This turns them into fondant "candy" and they are, oh, so good!
Finally it was time to fill and crumbcoat the cake and let it settle overnight. At last the top coat of frosting went on, was allowed to "crust" up so I could apply the quilting pattern sheet. This, for me, is just a light impression. This is, for me anyway, easier to do on fondant than on buttercream so you have to be very careful to press lightly with the pattern sheet. Press too hard and breathe too hard at the same time and you have suddenly ruined your finish. Then you have to start the final top coat of frosting all over again. I use a rolling cutter to go over the quilted lines so that they are deeper into the cake and more noticeable.
I used a leaf tip, tipped to the side, to make the ruffled edges and then I put the first layer of petals onto the cake. Then, using more frosting, added the rest of the petals until they were all in place. The last touch is the candy pearls set into the joins of the quilting.
This little cake took 75 hydrangea petals. Can you just imagine how many would go on a full 3 tier Wedding Cake!?! Fortunately I can just imagine how gorgeous that Wedding Cake would be when it was all stacked and finished. Just remember that if you do choose to go with a multi-flowered design that each flower adds to the cost of your entire cake. This cake, without the flowers, would cost $45. But when you add the flowers it takes the cost up to $82. That is due to all the hours that go into making the flowers look real but edible. Since hydrangeas are toxic to humans, this is the only safe way to have them on your cake.
This upcoming week brings another shower cake...can't wait to share!
Cat